Month: January 2006

Great Salmon Cakes Made with Old Bay Salmon Classic

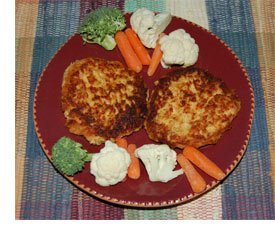
Old Bay Salmon Cakes
McCormick’s Old Bay Salmon Classic makes great Salmon Cakes simple. McCormick’s blend of seasonings in Old Bay is always great with seafood.

All you need to do is open up a can of salmon, mix in the Old Bay Salmon Classic and some mayonaisse, form the cakes, and then fry until crisp. It makes a simply delicious salmon cake in a jiffy. With Old Bay Salmon Classic, you can go from thinking about what to make for lunch, to eating a delicious salmon cake in just 10 minutes.

  1. Heat a 1 tbsp canola oil in a skillet.
  2. While oil is heating mix the salmon with the Old Bay Salmon Classic mix.
  3. Mix the mayonnaise into the salmon mixture.
    Make 4 large salmon patties.
  4. Test heat of oil by placing a drop of water in the oil. If the water sizzles
    in the oil the oil is ready.
  5. Place the salmon cakes in the skillet.
  6. Cook about 2-3 minutes per side or until golden brown on both sides.
  7. Can be served on a bun as a sandwich or by themselves.
  8. Serve with tarter sauce, and your favorite vegetable such as lima beans.

The Salmon Cakes can be broiled as well.
Homemade Beef Vegetable Soup

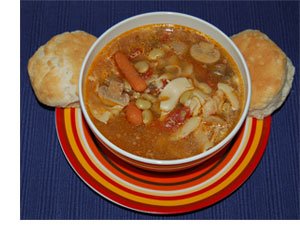
Picture of Beef Vegetable SoupThere’s nothing secret to making a good homemade beef vegetable soup. It’s really all about taking your time and letting the soup cook to allow the flavors to blend together.
We make our beef vegetable soup completely from scratch. There’s no need for any of those kits from the grocery store. All you really need is to plan ahead, and make a beef broth first. Patience is called for in making this soup. So about 6 hours before serving, place 4 large beef soup bones in a large stockpot, and cover with water. Place over medium heat and begin to heat to a boil.

While the water is heating, dice up a large onion, and 1 1/2 cups of celery. Toss the onion and celery in the pot, cover, and bring to a boil. Once the water is boiling, reduce the heat, and simmer, covered, for about 2 hours [longer is better].

Using a set of tongs, remove the bones from the pot and place on a dinner plate. Allow to cool 5 minutes or more, or until you can handle. Scrape any marrow from the bones onto the dinner plate, and discard the bones. Add the marrow back to the stockpot.

Add the following to the pot:

  • 1/2 pound of baby carrots (cut in half, if desired)
  • 1/2 tsp thyme leaves
  • 1/2 tsp rosemary leaves
  • 2 cloves garlic, minced
  • 1 tbsp parsley flakes
  • 1/4 tsp fresh ground black pepper
  • 3 medium sized turnips, peeled and diced (about 2 1/2 – 3 cups)
  • 1 can diced tomatoes

Cover, bring to a boil, and simmer. Meanwhile, cut up a about 1 to 1 1/2 pounds of chuck roast into 3/4 inch chunks. Cook the beef chuck roast chunks in a covered, non-stick skillet, turning often, until cooked through. Use a slotted spoon to remove the beef, and add to the stock pot. Simmer the vegetable soup for 1 1/2 hours, then add:
2 cups frozen lima beans
1 cup egg noodles

Cook for another 15 minutes. Remove from heat, and allow to cool a little before serving. Serve with buttered toasted sourdough bread, or piping hot biscuits. You can add salt to the served bowls of Beef Vegetable Soup but we don’t find it necessary.

Refrigerate any left over Beef Vegetable Soup, and add a little water when reheating. Beef vegetable soup always tastes better the next day.

Make a Delicious Beef Eye of Round Roast

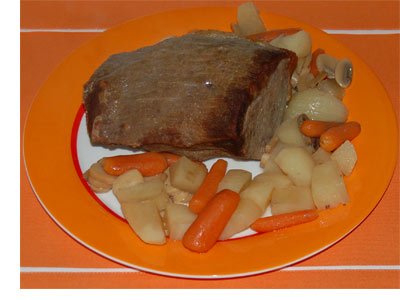
Picture of Eye of Round RoastA beef Eye of Round roast can be an easy meal. There’s not too much preparation, and you stuff the roast in the oven and wait for it to cook. What could be simpler? The cooking time depends on how big the roast is and as a guess we’d say an hour to an hour and a half would be usual.
We season our roast with Lawry’s Seasoned Salt. If you don’t have any Lawry’s around, you can also simply season the Eye of Round roast with salt and fresh ground pepper [but you really ought to try Lawry’s Seasoned Salt]. When we were young, and just growing up, it was always a treat to get the end cut of the roast, because that’s where most of the taste and seasonings are.

Our recipe calls for placing the roast in a Reynold’s oven bag. We find that the bag does a great job of holding the juices in so we end up with a juicy side of beef. You don’t have to use the oven bag, and can do just as well with a pan with a lid, or by tightly covering the pan with aluminum foil. But, one of the benefits of the oven bag is the easy cleanup — everything cooks in the bag so there is nothing burnt onto the pan.

  • Lawry’s Seasoned Salt
  • Adolph’s Tenderizer
  • 3-4 potatoes
  • 15-20 baby carrots, can be cut in half
  • 1 can sliced mushrooms
  • 1 large sweet onion,
  • 1 can low sodium beef broth
  • 3-4 lb eye round roast
  • Reynolds Oven Bag (or aluminum foil)
  1. Sprinkle Lawry’s Seasoned Salt & Adolph’s Tenderizer all over roast and
    pierce meat all over.
  2. Peel potatoes and cut into large chunks
  3. Place roast in extra large oven bag
  4. Peel and quarter onion.
  5. Distribute the carrots, potatoes, mushrooms and onion in oven bag around roast.
  6. Pour enough beef broth into oven bag to keep vegetables moist during cooking.
  7. Put several slits in top of oven bag.
  8. Cook until roast has an internal temperature of 165 degrees.

Recipe for Delicious French Onion Soup

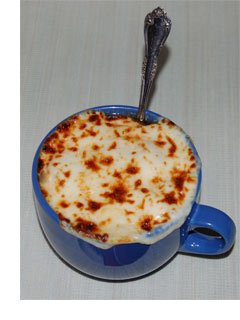
Picture of prepared French Onion SoupHere’s a recipe we make regularly, especially on busy week nights. It’s fairly quick to make, and we serve it as the main course for dinner. It can also be made as an appetizer, and should be placed in small bowls when used as the appetizer. This soup is simply wonderful with Vidalia onions, and spring is coming soon, so if you don’t feel like making this now, print this recipe and keep until April when the Vidalia onions are in season.
Recipe for French Onion Soup

  • 2-3 tbsps butter
  • 1-2 large sweet onions
  • 2 cans low sodium beef broth
  • 2 whole bay leaves
  • unseasoned croutons
  • 4-6 slices Swiss cheese or 1/2 cup shredded Gruyere cheese
  1. Melt butter in large skillet
  2. Cut onion in half. Put on cutting board flat side down and slice in thirds.
  3. Thinly slice onion.
  4. Cook onions until tender and slightly brown.
  5. Put beef broth in saucepan with bay leaves and heat till hot.
  6. Add cooked onions to hot beef broth and cook 3-4 minutes.
  7. Put soup in large soup crocks. Top soup with croutons. Top croutons with
    Swiss cheese.
  8. Place soup crocks under broiler and cook until cheese is melted and lightly
    browned.

You can subsitute chicken broth for the beef broth for an equally good French Onion soup.

‘Light’ Turkey & Rice Stuffed Green Peppers Recipe

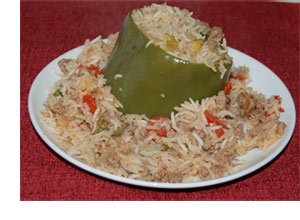
Picture of prepared Stuffed Green Peppers
Here’s a recipe for a ‘light’ stuffed green pepper. It’s light because it’s made using lean ground turkey instead of ground beef, so it’s lighter in fat.

First, cut the tops off of 4 green peppers. Then carefully cut out the center membrane of the pepper, and remove and discard the seeds. Set aside. Preheat oven to 350° F. Fill a 3 quart saucepan with water, and begin heating to a boil.

Meanwhile, dice up about 1/3 cup of onion. Dice the tops of the green pepper. Chop up 2 cloves garlic. Place the onion, diced green pepper and garlic in a large non-stick skillet along with about 1 tbsp olive oil. Cook the onion, garlic and green pepper for several minutes, stirring and turning often.

Add 1 pound lean ground turkey, 1/2 tsp poultry seasoning and cook, turning often until cooked through. Then add 1 1/2 cups Basmati rice, one can low sodium chicken broth, and 1 can diced tomatoes. Heat, and stir about 8-10 minutes. Meanwhile, blanche the green peppers in the boiling water about 4-5 minutes, turning to make sure all sides are cooked. Remove peppers from water, and set on a plate.

Place about 1/2 cup of the turkey rice mix in an oven safe caserole. Then place the green peppers in the casserole. Fill the peppers with the turkey rice mix, and fill sides with any remaining rice mix. Cover with lid or aluminum foil, and bake 30 – 45 minutes.

A Real Rib Eye Steak and Cheese recipe

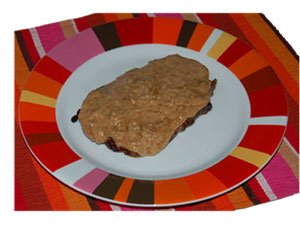
Rib eye steak with cheese topping
If we ran a restaurant, there is one recipe that we’d offer on the menu and we know it would be a hit. Now, this isn’t a steak and cheese sandwich. It’s a Rib Eye steak, broiled to medium well (or your desired doneness) and then topped with a sauce made with savory . It’s absolutely the best tasting steak we’ve ever had.

To make this recipe, first prepare the cheese sauce (recipe below). Then broil a Rib Eye steak seasoned only with salt and pepper until the desired doneness is reached. Remove the steak from the broiler, top with the cheese sauce, and serve. Yum!

Cheese Sauce

  • 1 large sweet onion, sliced thinly
  • 2 tbsps butter
  • 2 tsps sugar
  • 1 1/2 tsps flour
  • 1/2 cup beef bouillon
  • 1/4 cup milk
  • 1 cup Gruyere cheese, grated
  • 1/4 cup Parmesan cheese, grated
  1. Slice onion in half and the slice thinly
  2. Melt butter in large skillet
  3. Add sugar to melted butter
  4. Add onion to melted butter and sugar
  5. Cook onion until limp and lightly browned
  6. Add flour and cook for 1-2 minutes
  7. Add beef broth and milk
  8. Bring to a boil and cook over medium heat until thickened
  9. Add grated cheeses
  10. Cook until cheeses are melted
  11. Serve over cooked steaks

Any left over cheese sauce can be frozen and thawed when needed.

Quick and Tasty Garlic Bread with Johnny’s

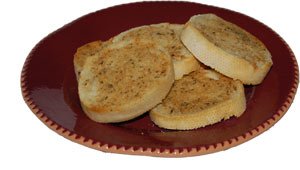
Garlic Bread made with Johnny's Garlic SpreadOn weeknights, we’re always trying to find shortcuts and save time making dinner. But we don’t want to sacrificed taste or quality. Often times that’s a challange as taking those short cuts will inevitably lead to loss of quality, flavor or both.
One of the reliable shortcuts we often take is making garlic bread with Johnny’s Garlic Spread & Seasoning. While making garlic bread usually isn’t the longest task of our evening meal, if we can save 5 minutes preparation time, and still have a delicious garlic bread we feel it’s worth it.

How to make Garlic Bread with Johnny’s Garlic Spread

  • 1 Loaf Italian Bread
  • 2 – 3 tbsp of butter
  • 1 tbsp Johnny’s Garlic Spread
  1. Preheat oven to 350° F.
  2. Slice Italian bread about 3/4 inch think.
  3. Place the Italian bread slices on a cookie sheet that is covered with a piece of aluminum foil.
  4. Bake 10 – 12 minutes until tops of bread turns light brown.
  5. Remove from oven and serve warm.

How To Dice A Potato

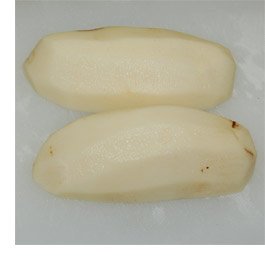
Diced potatoes are used in soups, stews, hash browns, and more, and yet you’re just supposed to know how to cut them up. Sure, there are lots of ways to slice and dice a potato, but some are just plain easier then others. We’re going to describe how we dice a potato. The pictures are of fairly large dices that we prepared for making beef stew.

Start by first peeling, and washing the potatoes. Since potatoes will turn brown if left exposed to the air, if you are going to dice a lot of potatoes, have two pans of water on hand. In one pan place the peeled potatoes, and in the other pan placed the diced potatoes after you cut them. Keeping the potatoes in those pans of water will keep them from turning brown. Make sure the potatoes are covered with water.

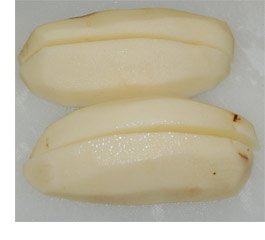
Once you have the potatoes peeled and washed, carefully cut them in half lengthwise and then place them cut side down on the cutting board.
First step in dicing a potato
Next cut the potato half in half again. If you have very large potatoes, you may want to cut the potato in thirds instead. We want about 3/4 – 1″ dices since we’re making diced potatoes for stew. If you’re making a meal that needs smaller diced, turn the slices of potatoes so they lay flat on the cutting board, and slice them lengthwise again.
Second step in dicing a potato
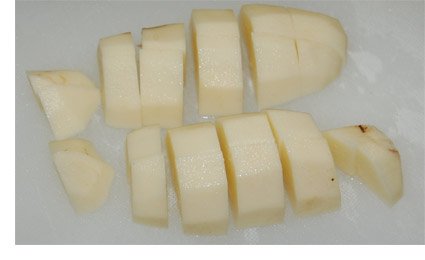
The final step is to form the dices by cutting the potatoes crosswise. Make these cuts by first starting at one end, then make the next cut 3/4 to 1″ over, and continues to cut the dices until you reach the other end.
Final step in dicing a potato

Using up the left over Roast Beef

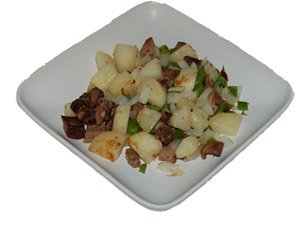
Serving of Beef Hash RecipeIf you’re like us, you usually have larger eyes while cooking then when eating. That is, you end up making more food then you can eat at a sitting. We’ve tried our best over the years to reduce this effect, but only on a few occasions have we been successful. Many times the reason is due to the sizes of packages of food, seasoning mixes, and cuts of meats and so it’s out of our control without going to trouble to reproportioning mixes. Since we don’t like to waste food, we work hard to come up with creative ways to re-serve the same dish. So today we’re going to describe a hearty and tasty meal that we served for breakfast the other day, and it’s certainly suitable for a lunch or dinner meal too.
In the movie shorts The Little Rascals, there was a negative association with hash, and if I remember right, it was usually corned beef hash. Don’t accept the negative connotation for that hash [it was in the script, if you know what I mean] the hash we make is excellent. I’m certain that you can make an excellent tasting corned beef hash too.

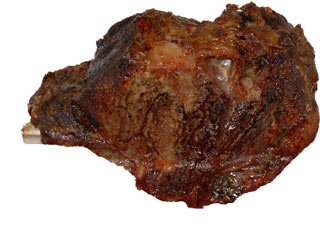
But our recipe is for Roast Beef Hash, and in particular the roast we’re using is Standing Rib Roast. This recipe will taste good with most roast beef, so don’t feel limited to a Standing Rib Roast.

Recipe for Beef Hash

  • One cup or more of diced roast beef
  • Two cups peeled and diced potatoes
  • 1/2 cup diced onion
  • 1/2 cup diced green pepper
  • 1 tsp Lawry’s Seasoned Salt
  1. In a large non-stick skillet cook the diced potatoes in about 1 tbsp canola oil. Simmer covered about 6 minutes, turning the potatoes every two minutes.
  2. Add to the skillet the diced onions, and green peppers, and stir. Cook uncovered about 3 minutes, turning a couple times.
  3. Add the diced beef, turn and stir in, and sprinkle with the Lawry’s Seasoned Salt.
  4. Cook 3 to 4 minutes more, stirring and turning until beef is well heated and potatoes are cooked through.

Recipe for Standing Rib Roast

Picture of a large slice of prime rib roastA standing rib roast is one of the easiest roasts to make, and is also one of the most delightfully flavored to eat. Many people today prefer to go out to dinner and eat at restaurants where the standing rib roast is also known as prime rib. But, you can make a standing rib roast at home that tastes just as good as the one you get at the restaurant. The secret is Lawry’s Seasoned Salt .

Lawry’s Seasoned Salt was originally developed at Lawry’s Prime Rib Restaurant in Beverly Hills, CA. It’s available worldwide now, and we sell it at Spice Place in a 40 oz jar. It’s taste is simply wonderful with a standing rib roast, any beef roast or steak, and even simply sprinkled on french fries or hash brown potatoes.

This past New Years Day we had a standing rib roast for dinner and here’s how we made it:

  1. Preheat oven to 300° F.
  2. Remove any visible fat from the top, and sides of the roast.
  3. Season the standing rib roast on all sides with the Lawry’S Seasoned Salt.
  4. Sprinkle lightly with garlic powder.
  5. Place the roast in a roasting pan with the fat side up.
  6. If you have a remote monitoring thermometer, insert the sensor now.
  7. Place a bread pan on the bottom rack of the oven and fill with water.
  8. Place the roast in the oven and cook 3 – 4 hours until the internal temerature measured by a thermometer is at least 165° F (medium).
  9. Remove from oven, and let sit 10 minutes before slicing.

Makes 3 -4 servings. Serve with a green salad, mashed potatoes, and Au Jus Gravy, and your favorite vegetable.