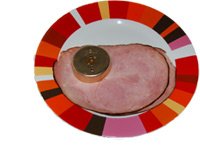
 The name scrapple was derived from the the word scraps. Originally scrapple was created to make use of the scraps of hog left over after butchering and certainly it still is. It’s made by boiling neck bones in seasoned water along with other odd parts of the hog for a few hours until the meat falls off of the bones. The meat is chopped up, and then mixed with seasoned cornmeal mush, and baked until firm. Here’s a vintage recipe for scrapple. But nowadays most of us aren’t butchering our own hogs, so we will either buy some scrapple at the grocer, or order it along with breakfast at a restaurant.
The current use of scrapple here in the United States is as a breakfast meat. But in early days of settlement in the US it was also served as the main entry for Sunday and special dinners.
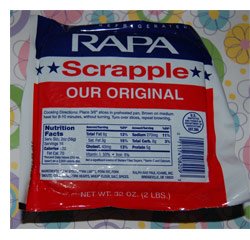
My favorite brand of scrapple is Rapa Brand Scrapple, and is made in the small town of Bridgeville, DE on the Delmarva Peninsula. The Delmarva is a rural agricultural and farming region for the most part and is bordered on the western side by the Chesapeake Bay and on the eastern side by the Atlantic Ocean. Bridgeville is located about dead center of the Delmarva and is in a strategic location for serving the farmers of the region. Rapa has a long history as a brand of scrapple. Ralph and Paul Adams incorporated RAPA Scrapple in 1926. In 1981 the RAPA Scrapple Company was purchased by Jones Dairy Farm, however RAPA Scrapple continues it’s operation in Bridgeville, DE. If you cannot find Rapa Scrapple in your area, the Rapa Scrapple company processes mail orders for scrapple in the winter months. The current price in 2007 is $38.00 for 12 one pound blocks (which works out to $3.17 a pound) plus UPS shipping costs. Scrapple freezes well so don’t worry about what you’d do with so much scrapple at one time. My favorite flavor of Rapa Scrapple is their original. Other flavors produced by Rapa are Beef Scrapple, Scrapple with Bacon, Hot & Spicy Scrapple, and Greensboro Brand. For mail orders from Rapa, you may mix and match any of these varieties to meet the 12 package requirement. Orders must be placed by mail as the company only accepts checks or money orders. Call Rapa 800-338-4727 to get the shipping costs before sending payment to them.
Another brand of scrapple that can be found in my local Maryland grocers is produced by the Kirby and Holloway Provision Company, which is also located in Delaware, in the small town of Harrington, DE just a couple towns and a few miles north of Rapa’s Bridgeville Locations, and is also on US Route 13. I have never had the Kirby and Holloway brand of scrapple so I cannot comment on it’s flavor. I can say I extremely enjoy all of the Kirby and Holloway brand sausages, which are flavorful and unlike many sausages are not loaded with fatty meat. So since they produce such quality breakfast and dinner sausages, I would have to say that the scrapple would be of high quality as well.
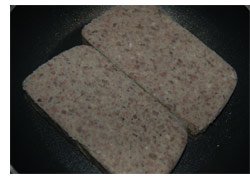 Some folks are turned off by thinking about what goes into scrapple, and consider it nasty food. But nothing could be further from the truth. It’s a tasty meat dish that makes for change of taste in your breakfast meals. The official ingredient list on the package of Rapa Scrapple lists: Pork Stock, Pork Livers, Pork Fat, Pork Snouts, Corn Meal, Pork Hearts, Wheat Flour, Salt and Spices. It is not a low fat food though and like sausages needs to be eaten in moderation. According to the Nutrition Facts, each serving of scrapple contains 8g or 12% daily value of fat. That’s not lean, but is only a fraction of the fat found in fat dogs (hot dogs) which many labels state the daily value of fat at 38% [and don’t even look at the label on a package of bacon if you’re concerned about the fat in scrapple].That said, I try to eat right, and so I may eat scrapple only once every 2 to 3 months.
To Cook Scrapple
Scrapple is a little tricky to cook. I’m not sure cook is the right term since it’s already cooked. It’s really being reheated and browned for serving. The basic cooking instructions are:
Slice the scrapple through the wrapper into 3/8″ slices. Fry in a non-stick skillet over medium heat for about 8 to 10 minutes then turn over and brown the other side. That sounds simple, right? Well it really is that simple except for one thing — knowing when to turn the scrapple over.
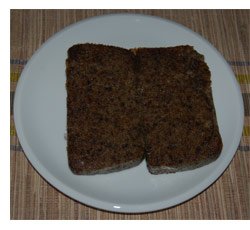 Scrapple can’t be rushed, nor cooked in the microwave. It needs to be pan fried until the bottom has browned, and turned only once, and cooked until the bottom on the other side has browned too. If you turn the scrapple too early, then the slice with fall apart (it is made with corn meal so will be a rather mushy mess in this case). If you cook scrapple too long, then the outside will be hard, and the inside will be mushy which makes it difficult to eat. Our picture here of the cooked scrapple shows the right level of browning. The outside is brown, and yet still soft enough to cut with a fork.
Serve cooked scrapple as a breakfast meat dish along with eggs and potatoes. Scrapple can also be used as a meat on a scrambled egg sandwich on toasted wheat bread with cheese. Give scrapple a try with your breakfast. There are lots and lots of scrapple made so someone must be eating it. And it’s those of us adventurous enough to get past the ingredient list know how good it tastes.
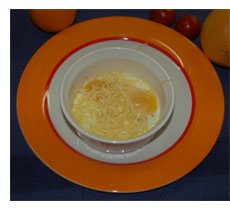 If you’ve never tried baked eggs before you might find the thought a little odd. While it takes a longer to make baked eggs, you’ll find that the texture of the baked eggs is much different then you get from fried eggs, almost like that of hard boiled eggs. It’s easy to make baked eggs, but you’ll need to have a couple if items to do so. First, you will need an oven safe ceramic bowl, such as a ramekin or a small Corning Corelle dish. Second, you’ll need an 12″ x 9″ x 2″ baking pan that you’ll fill halfway with water.
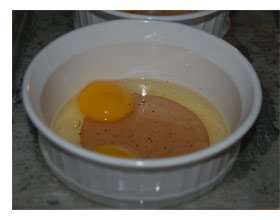 To make baked eggs, place a 12″ x 9″ x 2″ pan on the middle rack of your oven, and fill the pan half way with water. Preheat the oven to 350° F. While the oven is warming, lightly grease a ramekin or other oven safe small dish. You may add a round piece of ham or Canadian bacon to the bottom of the dish if you like. Then break 2 eggs into the ramekin, and place the ramekin into the pan of water. Bake about 20 to 25 minutes, until the eggs are set on top. Don’t try to rush the baking. Let them cook slowly in the water until the whites and yolk are firm. Then carefully remove the ramekin from the pan, leaving the pan of hot water on the rack in the oven (DON’T TRY TO CARRY THE PAN OF HOT WATER – LET IT COOL BEFORE REMOVING THE PAN). Immediately sprinkle the top of the eggs with grated white or yellow Cheddar cheese, and serve. Make one ramekin per serving, and you can fit 2 ramekins into the pan of water.
 The name scrapple was derived from the the word scraps. Originally scrapple was created to make use of the scraps of hog left over after butchering and certainly it still is. It’s made by boiling neck bones in seasoned water along with other odd parts of the hog for a few hours until the meat falls off of the bones. The meat is chopped up, and then mixed with seasoned cornmeal mush, and baked until firm. Here’s a
  Some folks are turned off by thinking about what goes into scrapple, and consider it nasty food. But nothing could be further from the truth. It’s a tasty meat dish that makes for change of taste in your breakfast meals. The official ingredient list on the package of Rapa Scrapple lists: Pork Stock, Pork Livers, Pork Fat, Pork Snouts, Corn Meal, Pork Hearts, Wheat Flour, Salt and Spices. It is not a low fat food though and like sausages needs to be eaten in moderation. According to the Nutrition Facts, each serving of scrapple contains 8g or 12% daily value of fat. That’s not lean, but is only a fraction of the fat found in fat dogs (hot dogs) which many labels state the daily value of fat at 38% [and don’t even look at the label on a package of bacon if you’re concerned about the fat in scrapple].That said, I try to eat right, and so I may eat scrapple only once every 2 to 3 months.
 Scrapple can’t be rushed, nor cooked in the microwave. It needs to be pan fried until the bottom has browned, and turned only once, and cooked until the bottom on the other side has browned too. If you turn the scrapple too early, then the slice with fall apart (it is made with corn meal so will be a rather mushy mess in this case). If you cook scrapple too long, then the outside will be hard, and the inside will be mushy which makes it difficult to eat. Our picture here of the cooked scrapple shows the right level of browning. The outside is brown, and yet still soft enough to cut with a fork.
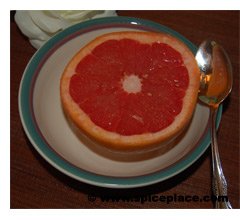 There is something to be said about enjoying fresh citrus fruit on a cold winter’s morning. When I look outside, and see the bare trees and the leaves all over the ground, the tropical grapefruit sections on the kitchen table brings thoughts of warm summer days, and bring flowers. We slice our grapefruit in half cutting across the fruit perpendicular to the stem end. Then we use a sharp paring knife to cut the grapefruit sections along each side of the membrane the separates the sections. Next, we use the same paring knife to free the sections by cutting the grapefruit along the rind. To serve, place the grapefruit sections in a cereal bowl, sprinkle the tops of the fruit with a little sugar or non-sugar sweetener, and serve with a small spoon. Use the spoon to dig out the grapefruit sections. When all of the sections have been eaten, grab the grapefruit in one hand, and squeeze the remaining juice out, catching in on the spoon. Repeat until no more grapefruit juice can be squeezed out.
 1. Cut Grapefruit along each side of membrane.
 2. Then cut along each section along rind and sprinkle with sugar.
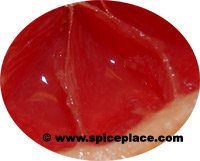 3. After eating the sections there will be lots of juice left over. Simply squeeze the grapefruit in half, and catch the juice on a spoon to enjoy.
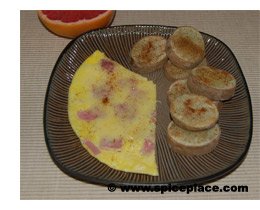 The typical breakfast omelet is made by pouring scrambled eggs into a hot frying pan, cooking the egg until firm, and then adding filling ingredients such as ham, cheese, tomatoes, green pepper and even blanched fresh asparagus. We regularly make omelets this way and have a post in our blog about the exact steps needed to make a good omelet. We’re always seeking change and variety in our meals, so todays post is about making an omelet in a different way.
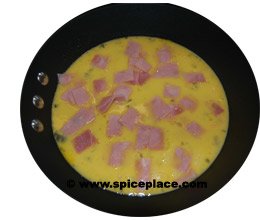
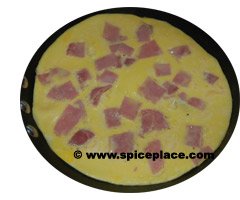 The picture to the right here is of the finished omelet before adding the cheese as  discussed above. If you look closely, you’ll see how the ham is in the cooked egg mixture which is different from the standard omelet. This is a great way to serve the same omelet, and yet have it be different.
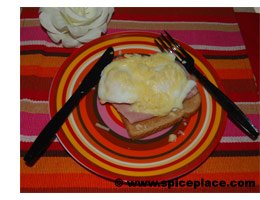 It is said that variety is the spice of life and variety is something we actively seek in our breakfast meals. Yesterday, we made poached eggs with ham on whole wheat toast topped with white cheddar cheese. This was a nice change of pace for us and we can’t remember the last time we made poached eggs.
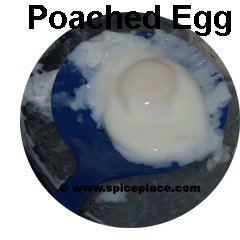 There will be some thin egg white surrounding the poached eggs when they’re removed from the pan and these should be discarded.
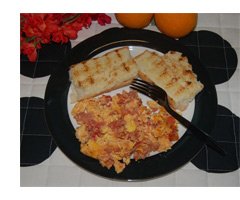 We are always trying to add variety to our breakfast meals. So this recipe ranks high among our favorite new breakfast dishes. This last weekend we thought we would experiment with McCormick Greek Seasoning with our breakfast. What we came up with was a Mediterranean Tomato and Scrambled Egg dish that was wonderful.