Category: Barbecue

Barbecued foods

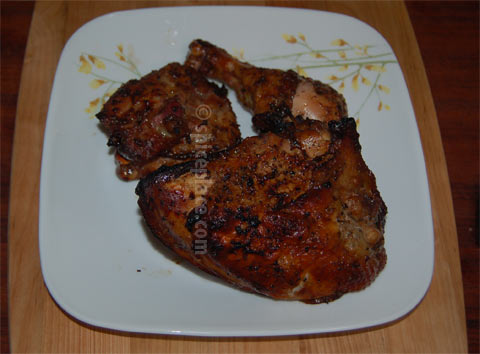
Asian Seasoned Grill Chicken

Asian Seasoned and Grilled Chicken

A unique and delicious taste sensation results from this recipe which is flavored with a large variety of Asian flavors. These tastes include McCormick Chinese Five Spice, Hoisin Sauce, Vietnamese Fish Sauce and Sesame Oil. If you’re a regular here, you’ll know we like to marinate our grilled foods before cooking and this recipe is no exception.

Ingredients
1/4 cup sugar (we like the Sugar In The Raw Style)
2 tsp Chinese Five Spice
2 tbsp Sesame Oil
1 tbsp Hoisin Sauce
1 tbsp Lawry’s Seasoned Pepper (or equal portions black pepper and crushed red pepper)
1 tbsp Pick-A-Pepper sauce (Jamaican Sauce similar to A-1. Use A-1 if you can’t find Pick-A-Pepper)
1 tbsp Vietnamese Fish Sauce
1 tsp Corn Starch
1/2 cup water
1 tbsp olive or canola oil

1 Pick of the Chicks package of cut up chicken (2 breasts, 2 thighs, 2 drumsticks)

Combine all of the ingredients (except chicken in a small bowl. Mix, then microwace for 1 minute. Mix, and microwave again for 30 seconds. Mix, and microwave one more time for 30 seconds. Whip well with a fork. Set Aside.

Wash and rinse chicken well then place in a one gallon sized zipped style heavy duty plastic storage bag. Pour the seasonings over top of the chicken. Place in refrigerator for 1 to 4 hours.

Heat grill (We’re old fashioned an enjoy charcoal grilling. Use your gas grill if you like). Remove chicken from marinade and save marinade in a paper cup or ceramic cup to use during cooking. Cook chicken using indirect heat (i.e. coals on one side of grill and chicken on other). Cook for one hour to one hour 15 minutes, turning meat and marinating with reserved marinate at 15, 30 and 45 minutes. Test doneness with meat thermometer to 165° F. Discard any remaining marinade. Do Not add marinade after 45 minutes because it’s touched the raw chicken.

Serve with Steamed Corn on the Cob, Cole Slaw, and/or a tomato/cucumber/onion salad.
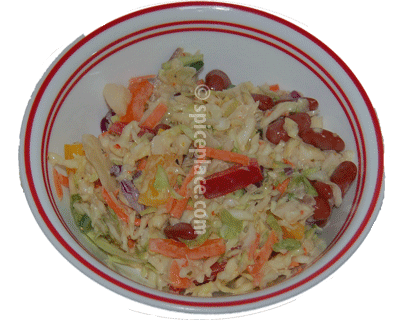
Santa Fe Pepper Coleslaw

This recipe adds several twists to the standard coleslaw. First it adds bell & jalapeno peppers to the mix, something I’ve never done before. Second, it uses McCormick Big n’ Bold Santa Fe Style Seasoning for flavor. And third it adds kidney beans, rich in taste and fiber. So for those reasons, it’s worth the adventure of trying this healthy coleslaw. Fiber with Flavor sounds (and tastes) healthy to me!
Santa Fe Coleslaw

4 Cups shredded cabbage
1/4 cup shredded carrots
1/4 cup julienned red bell peppers
1/4 cup julienned yellow bell peppers
1/4 cup julienned green bell peppers
1 can Red Skinned Kidney Beans, Drained, and Rinsed
1/4 cup Jalapeno peppers, diced
1/4 cup diced onion
3/4 cup mayonnaise
1 tbsp sugar
1 tbsp McCormick Santa Fe Style Seasoning

  1. Combine peppers and kidney beans together. Mix well.
  2. Make dressing by mixing mayonnaise with sugar and Santa Fe Seasoning.
  3. Combine cabbage, carrots, onions, peppers, kidney beans together. Mix well.
  4. Mix in dressing and mix to coat well.
  5. Refrigerate for 40 minutes or more to allow flavors to meld together.

Serve Chilled.

Psst. Know The Secret For That Tender Steak?

Barbecued New York Strip Steak

For years, we’ve been on the search for finding that tender cut of meat that we get at the restaurant and from specialty steak suppliers. We’ve bought steaks from gourmet shops, organic farmers, organic grocers, high end grocers, and so on. Yet, we never seemed to get a tender steak. We tried USDA Choice and USDA Prime cuts, which made no difference either. We almost gave up on the idea believing that that restaurants had a specialty supply of select meats. Then one day recently, the light came on and we discovered the secret.

We’ll tell you in just a second what the secret is and when we do, you’re going to say, duh! And it’s a big duh, something we all should know and in fact do know about. The secret is, (ready?) Adolph’s Meat Tenderizer. See, it’s something you know about, probably have in your kitchen cabinet and most likely don’t use very often. But you should use Adolph’s often and on every steak you barbecue this summer. Oh, one more question. Ever wonder how that barbecue joint makes tender baby back ribs and beef brisket? The answer to that question is that they use Adolph’s Tenderizer. That’s it.

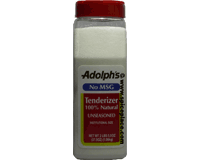
Adolph's TenderizerSo break out that bottle of Adolph’s Meat Tenderizer this weekend, sprinkle a little on both sides of the steaks. Use about 1 tsp of Adolph’s per pound of meat. If you have one, prick them with a corn on the cob holder, otherwise use a fork. Then season as you desire, and they’re ready to grill immediately. You may cover and refrigerate for 2 – 3 hours for more tenderizing but that’s usually not necessary.

Adolph’s is made from the Papaya, is all natural and contains no MSG. It’s a little bit of magic in a bottle. What are you waiting for? Light that grill and be surprised with how you can now make those tender steaks like you get when you eat out at that expensive restaurant and without paying $20.00 a pound for them. Try it! You are certain to be amazed.

Making a Monterey Seasoned & Grilled Whole Chicken

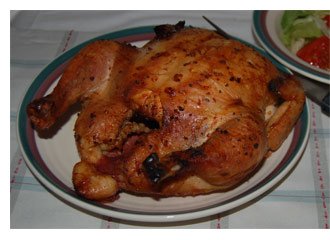
Barbecued Monterey Style Seasoned Chicken

McCormick’s Big and Bold Monterey Style Seasoning has become a favorite seasoning of ours. It’s a mix of coarsely ground garlic, red bell pepper, roasted garlic, red pepper, and contains tumeric and annatto for adding a yellow color to foods. We find that the yellow color adds a pleasing and appealing look to chicken. So today we’re going to share our recipe for making a barbecued whole chicken seasoned with McCormick’s Monterey Style Seasoning along with a little bit of chili powder.

Monterey Seasoned Chicken Recipe
a 4 pound whole chicken
2 tbsp McCormick Monterey Style Seasoning
1 tsp chili powder
1 tbsp sugar
2 tbsp vinegar
1/2 cup water

  1. Wash the chicken under cold water and set on a plate to allow excess water to drain off.
  2. Place the Monterey Style Seasoning and Chili Powder in a cup. Add sugar, water and vinegar. Stir to mix well.
  3. Put the whole chicken in a one gallon size freezer zip-loc storage bag.
  4. Dump the seasonings over top of the chicken, seal the bag, and flip over a few times to distribute the seasonings. Place the chicken in the refrigerator and marinate for about 2 hours turning over every 1/2 hour so the seasonings evenly infuse the chicken.
  5. Since this is a whole chicken, it needs to be cooked indirectly so it cooks slowly and completely. So place the charcoal on only one side of the grill. Light grill.
  6. Remove the chicken from the zip-loc bag, and place into a disposable heavy-duty aluminum pan that has the bottom lined with non-stick aluminum foil. We use the disposable pans because the smoke from cooking will permanently mark a real roasting pan.
  7. When the grill is ready, place the chicken on the side away from the heat, cover and cook for 1 to 1 1/2 hours or until the internal temperature of the chicken is about 170° F. For proper food safety, it’s very important that a meat thermometer is used to make sure the chicken it cooked thoroughly to prevent illness from under cooked chicken.
  8. Let the cooked chicken sit for 10 minutes before carving or else you’ll find you have shredded chicken (instead of sliced chicken).

Stove Top Barbecued Beef Brisket

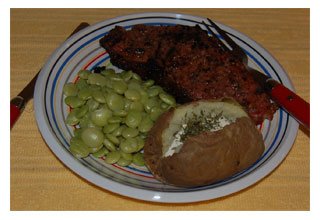
Serving of Barbecued Beef Brisket

Some of the most flavorful cuts of beef are also the most tough. With this recipe for Barbecued Beef Brisket, we’re going to take one of the toughest cuts of beef, apply some tenderizer, braise it, boil it, cook it in barbecue sauce, all done without a grill, and end up with a very tender meal. Be aware that this is a recipe that takes time. From start to finish is about 6 1/2 hours of preparation and cooking. The results are worth the investment in time.

We use a couple of what might be hard to find ingredients in this recipe which are Onion Juice and Garlic Juice. We feel that for this brisket roast that the Onion and Garlic Juices instead of sliced onion and minced soak garlic let the flavors soak more deeply into the food and impart a lighter flavor since the flavor is more dispersed. You can find these onion and garlic juices in Safeway Stores and we’re trying to find a supplier for our e-store.

Recipe for Stovetop Barbecued Beef Brisket

Step 1

  • 5 pound beef brisket
  • 2 tsp Adolphs Meat Tenderizer
  • 1 tsp Onion Juice
  • 3 tsp Garlic Juice
  • 1/4 tsp Tabasco Sauce
  • Ground Black Pepper
  1. Evenly sprinkle the Adolphs Tenderizer over both sides of the brisket. Season with black pepper, and then brown the brisket on all sides in a large dutch oven that has been coated with canola oil.
  2. Add water to the dutch oven to cover the brisket, and then add the onion juice, garlic juice, and Tabasco sauce.
  3. Bring to a boil, cover, and simmer for 2 1/2 hours.

Step 2

  • 1 16oz bottle any quality barbecue sauce
  • 1/2 cup white vinegar
  • 1/2 cup Worcestershire Sauce
  • 1/4 cup brown sugar
  • 1/4 cup liquid smoke
  1. Preheat oven to 250° F.
  2. Remove the brisket from the dutch oven and discard the water.
  3. Wash the dutch oven, dry and lightly oil with canola oil.
  4. Place the brisket back into the dutch oven.
  5. Place the following in a non-stick 2 quart saucepan: barbecue sauce, vinegar, Worcestershire sauce, brown sugar, and liquid smoke. Heat, and stir until the brown sugar is dissolved, then pour over the brisket.
  6. Cover the dutch oven, and place in oven
  7. Cook for 4 hours, checking every 45 minutes, turning, and making sure the sauce stays moist.

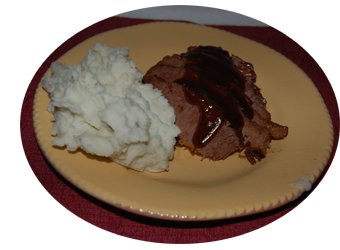
We served our roast with Garlic Mashed Potatoes and used the barbecue sauce with cooked with over top of the sliced brisket.

Tip: When cutting the brisket, cut across the grain so that the tough fibers in the brisket are severed.

Stovetop Barbecued Pulled Pork Sandwiches

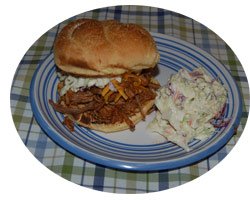
Picture of Barbecued Pork Sandwich
It’s still dead of winter here on the East Coast, and we haven’t barbecued in what seems like forever. With the deck covered by 6 inches of heavy frozen solid snow, we can’t even consider firing up our grill. So it’s times like these that making a barbecued pork on top of the stove come in handy. We guarantee that this is a great recipe and the hardest part is cutting up the pork. The rest of the time the pork is simply simmering on the stove, and when done cooking, the pork will shred with the touch of a fork.

5 pound boneless pork shoulder “Boston Butt” roast
1/2 cup white vinegar
1/4 tsp (or more) Tabasco Sauce
1 1/2 tbsp celery seed
1 tsp garlic juice
1 tsp onion juice
2 cups water

You need about 5 pounds of meat for this recipe, and if the store only has bone-in pork shoulder, then purchase about an 8 pound roast. It’s not an easy task to cut the meat from a pork shoulder (or Boston Butt) roast, so I’d recommend finding a boneless roast.

Cut the roast into about 3/4 pound chunks. Lightly grease a large stock pot or dutch oven with olive oil. Toss in the pork, and cook on high, turning, until the pork browns on the outside, turn, and repeat a couple times. Don’t worry about cooking the pork through, there’s plenty of time for that coming up, what you want is to get some caramel color on the pork.

Once the pork butt is browned to your desire, add the water, vinegar, celery seed, garlic juice, onion juice, and Tabasco sauce. I like to use garlic and onion juice for this recipe because the flavor will blend into the pork and there are no pieces of onion or garlic in the barbecued pork. If you can’t find onion or garlic juice, substitute with 1/2 tsp chopped garlic, and 1/4 cup finely diced onion. Bring the liquid to a boil, then cover and simmer for about 2 hours. Turn the meat over ever half hour so that the meat gets evenly flavored by the sauce. With a tight lid, and slow simmer, you shouldn’t need to add any water, but if you see the pan getting dry, add a little water.

When the pork is done, it will rip to shreds with no effort at all when touched with a fork. Drain the pot into a collander, rip up the pork, and serve with a good barbecue sauce such as Staubs. Heat the barbecue sauce, then mix 1 or 1/2 tbsp of BBQ sauce with 1 1/2 cups of pulled pork.

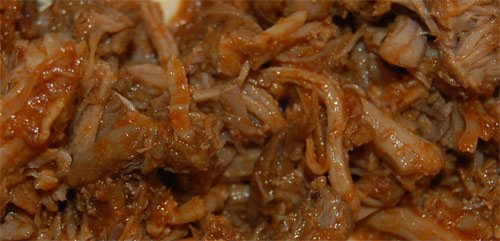
Picture of pulled pork bbq and sauce

I like to serve my pulled pork sandwiches on toasted kaiser rolls topped with a little bit of shredded Cheddar cheese, and 1 to 2 tbsp of fresh made coleslaw*, and some coleslaw on the side. Exactly as pictured above.

*Make a quick delicious coleslaw with a package of Fresh ExpressTM Coleslaw Mix and Marie’s Original Coleslaw Dressing, which you can find in the salad dressing aisle of the grocer. Mix the coleslaw with the dressing right after the pork BBQ mixture is set to simmer and refrigerate. The coleslaw will be perfectly flavored at the same time the pork BBQ is done.

How to Grill a Delicious Pot Roast

BBQ Pot Roast RecipeIt seems to us that grilled foods have more flavor than foods that are simply baked or pan fried, so we BBQ our dinners about half of the time. For weeknight barbecues, we cook foods that grill in under an hour, these are the typical foods like steaks, chicken breasts, hamburgers, and pork chops. But when the weekend comes around, and we can start cooking our dinner earlier, we cook more interesting foods like pork roasts, and pot roasts. Earlier this summer we posted here in our blog a recipe for a delicious smoked North Carolina Pulled Pork Sandwich, which starts with a pork roast barbecued and smoked. It takes some time to make, but the reward is worthy of the effort.
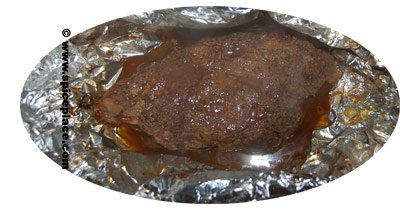
Another roast that we love to cook on the barbecue is the chuck roast (pot roast). Chuck roasts are a very flavorful cut of beef that must be cooked slow in order to become tender. When baked in an oven, it’s typically roasted at 325° F for 3 hours. It would be a tall order to cook a chuck roast on the barbecue for that long, so we enlist the aid of Adolph’s Meat Tenderizer in order to cut the cooking time by an hour or so. The magic of Adolph’s is Papain (from papaya fruit) that breaks down the tough parts of the roast. Many folks think Adolph’s has MSG in it, since it looks almost the same, but there is no MSG in Adolph’s tenderizer.

So here’s how we make our Grilled Pot Roast:

What You’ll Need To Make a Grilled Pot Roast

  • 3 – 4 Pound Pot Roast
  • 1/3 cup sugar
  • 1/3 cup black pepper
  • 3 1/2 tsp Adolph’s Meat Tenderizer
  • 1/4 tsp Tabasco Sauce
  • Garlic powder
  • 1 onion, sliced into rings
  • Potatoes (optional)
  • Baby carrots (optional)

How to Prepare the Grilled Pot Roast

  1. Select a nice 3 – 4 pound chuck roast. Look for a roast that has less fat in it.
  2. Combine 3 1/2 tsp Adolph’s Meat Tenderizer with 1/4 tsp Tabasco Sauce, 1/3 cup ground black pepper, and 1/3 cup sugar. Mix the Adolph’s, Sugar, and Pepper together until well blended.
  3. Place the chuck roast on a large plate, and coat all sides with the seasoning mix.
  4. Place the roast in a plastic zippered bag, and refrigerate for an hour or so.
  5. Prepare your grill for cooking. If you’re using a charcoal grill, place the coals only on one side of the grill.
  6. When the grill is ready for cooking, place on your kitchen counter top 2 or 3 layers of wide, heavy duty aluminum foil that are large enough to completely wrap around the pot roast. Place the roast on top of and in the center of the aluminum foil.
  7. Sprinkle the top of the roast with garlic powder, and top with a thick layer of sliced onion.
  8. If you have room, you could toss some 1 1/2″ chunks of peeled potatoes and baby carrots into the foil around the edges of the roast.
  9. Close up the foil tightly, and place on the grill 3 to 4 inches away from the heat.
  10. Cook for 1 1/2 to 2 hours, turning every 20 – 30 minutes so that the roast cooks evenly.
  11. When you feel the roast is done, open and test the temperature with a meat thermometer. The temperature should be at least 165° F.

If you cooked this Grilled Pot Roast with the vegetables, you’ll have a complete meal all cooked on the grill. If not, serve with our Tabasco Garlic Mashed Potato Recipe, gravy and a vegetable of your choice.

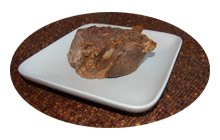
BBQ Chuck Roast in Foil

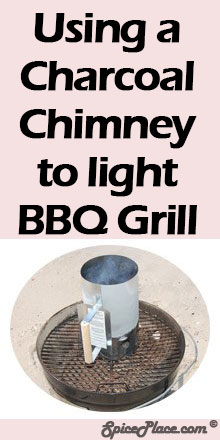
Using a charcoal chimney to light charcoal

Using a Charcoal Chimney

Up until recently, we’ve always relied on charcoal lighter fluid to light our charcoal. And we’re charcoal enthusiasts, so all we cook with is charcoal. We’ve watched a few of the Dutch Oven and Camp Cooking shows with Cee Dub which is shown on RFD-TV and noticed he always used the charcoal chimneys to light the charcoal for his dutch ovens. So we were out shopping one day last summer, and noticed a charcoal chimney section at the local store, and bought one. This was the best find for the summer barbecue. In our pictures here, we are using Cowboy Brand Hardwood Charcoal. The same method works with Kingsford or other lump charcoal brands.

Here’s how to light charcoal using a Charcoal Chimney
Picture of Bottom of Charcoal Chimney LighterA Charcoal Chimney charcoal lighter is a metal tube about 12 inches long, and 6 inches in diameter. The bottom of the Charcoal Chimney has vents, and a grate sits about 2 inches above the bottom. In the bottom of the Charcoal Chimney, under the grate, you place some crumbled newspaper under and the top of the grate supports the charcoal. In our picture here, you can see we’ve placed some crumbled newspaper in the section of the charcoal lighter that’s under the grate.
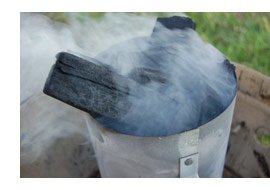
Picture of Charcoal Chimney Getting Started
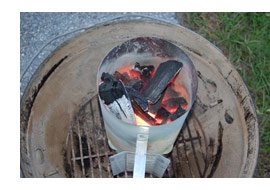
Place the charcoal chimney on a fire proof surface before you light it. We use the bottom grate of our Weber grill. Light the newspaper through the vents in several places. If you are in a location where it’s really windy (15 – 20 mph), a little bit (1/2 oz) of charcoal light fluid can be poured onto the newspaper to help get it started. We use that method when we’re cooking lunch on the beach. In most cases, a simple lighting in 3 or 4 places will do. The newspaper will smoke, burn slowly, and the heat from the newspaper will be funneled up the chimney, and heat the charcoal to light it. In the picture to the right, you can see the smoke from the newspaper rising from the Charcoal Chimney as the newspaper heats the charcoal. It takes 10 – 15 minutes to start the charcoal. Perhaps a little less time if you’re using Cowboy Brand hardwood charcoal.
Picture of Chimney Lighter
As the charcoal at the bottom of the chimney lights, it will add more heat to the rising column of heat going up the chimney, and will light the charcoal all the way to the top. Here’s a picture of the charcoal all ready to be dumped out onto the charcoal grate. The handle of the chimney is made of wood, and has a heat shield to protect your fingers. Even with those safety factors, please use caution when dumping the charcoal out of the chimney onto the grate of your grill as the chimney itself will be very hot. You should also have a place to set the very hot charcoal chimney on after you empty the charcoal from it as it will be very hot for many minutes.

We’ve had great success using our charcoal chimney to light our grill, and wish we had found this magic device 10 years ago.

A Gourmet Hamburger?

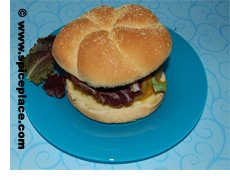
Gourmet Hamburger RecipeIf we were to survey a hundred people and ask them to name a gourmet food, the chances that a hamburger would end up on that list are between zero and nil. So what’s the deal with the name of this article? Durkee Seasonings has a new seasoning blend named Gourmet Burger Seasoning and it’s quickly become our favorite way to season our grilled hamburgers. And even though salt is the first ingredient in the ingredients list, there really isn’t too much salt in the mix. I’d know because I haven’t used salt in cooking in years.
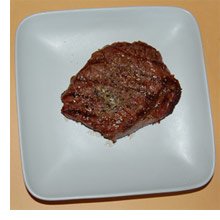
There’s two ways to use Durkee Burger Seasoning, mix the seasoning in with the hamburger meat, and then form the burgers, or to simply sprinkle on the hamburgers before cooking (or right before serving, which makes 3 ways, I think). My preference is to mix the seasoning into the meat before cooking. If you’re using pre-made frozen burgers your choice is limited to sprinkling the burger seasoning on the hamburgers. Either way results in a delicious tasting burger, and I feel the blended in method results in a more deeply seasoned hamburger.

When mixing the seasoning into the hamburger use about 2 tsp of seasoning per pound of lean ground beef. Add 1/4 tsp of Tabasco Sauce if desired. For food safety reasons, always cook hamburgers to 170° F (medium well). We like to serve our grilled hamburgers on toasted Kaiser rolls, along with Cheddar cheese, sliced pickles, and condiments like ketchup, mustard and mayonnaise. Side dishes that go well with this meal are macaroni salad, cole slaw, potato salad, or a tomato-cucumber salad. If you’re having a weekend barbecue party, you might want to make all of the salads so your gets can choose their favorite.

Canadian Seasoned Ribeye Steaks for the Barbie

Barbecued Canadian Steak RecipeSummer weekends seem destined for barbecuing outdoors. By cooking outdoors, we don’t add any additional heat to our homes, and the barbecued foods we make take on additional flavor from the grill cooking. Plus it’s a great opportunity to use our deck, and enjoy the company of our family and friends.

The most frequently outdoor grilled foods are steaks, hamburgers, hot dogs and chicken pieces. We often venture beyond the usual and regular readers of our blog know we’re not afraid to cook beef roasts, pork roasts, whole chicken, and ribs. But, today we’re making a recipe that’s straight forward, Canadian Seasoned Rib-eye steaks. If you’re a new barbecuer, this is a great starting recipe and is about the easiest barbecue recipe around. At one time we’d eat one of these ourselves, but nowadays, we split the steak with another person.

We don’t have a gas grill and always cook on our Weber kettle grill. We prefer the charcoal cooking over gas grills and also love the more basic cooking method of charcoal. It’s hard to explain, but I think there’s a feeling of pride in being able to cook well outdoors with basic unregulated cooking appliances like the Weber. There is a raw naturalness to it, that doesn’t exist in our everyday modern lives.

So light the barbecue, you’re welcome to use your gas grill. When the grill is ready, sprinkle the Ribeye Steaks with Canadian Steak Seasoning, and grill them close to but not right over the coals for about 5-8 minutes for the first side, and 4 minutes on the other side. Cut the steak to check for doneness, and continue cooking if needed. Sprinkle a little more Canadian Steak Seasoning just before serving. There’s no need for barbecue sauces with this recipe. Simply cook, season, and serve.