Category: Cooking Ideas

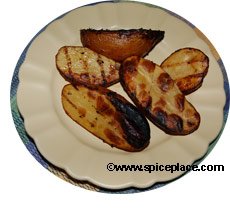
Grilled Redskin Potatoes for your weekend barbecue

If you are looking for something different to make for your summer weekend barbecues, then this Red Skin Grilled Potato recipe might be something to add to your barbecue menu. It’s really a simple recipe, and takes only a few minutes preparation time, and 30 – 40 minutes on the grill. The red color of the potato skins add to the presentation at serving time. The recipe is seasoned simply with Italian salad dressing.

What you need to make Grilled Red Skin Potatoes

  • 1/2 pound of red skin potatoes per serving
  • Italian Salad Dressing

To make Grilled Red Skin Potatoes
  1. Wash, and slice the red skin potatoes in half lengthwise.
  2. Place the potatoes in a ziploc bag. Pour in enough Italian salad dressing to allow the potatoes to marinate in the dressing.
  3. Place the potatoes in the refrigerator for 1 hour to let the potatoes season.
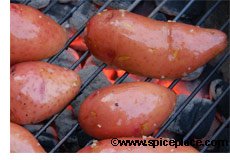
  4. Grill indirectly on a barbecue, not over the heat but 6 – 10 inches away from the coals. Cover grill and turn the potatoes over every ten minutes.
  5. As you turn the potatoes, move the close ones out and the farther away ones in to let the potatoes cook more evenly.
  6. Grill the Red Skin potatoes until done, about 30 to 40 minutes depending on how close the potatoes are to the heat.

Hummingbirds love our flowers

We plant lots of flowers for the hummingbirds, and this time of year they’re all in bloom. Hummingbirds really love bee balm which is just starting to bloom now. Hummingbirds also love Columbine, lilies, and honeysuckle. All of those plants are perennials, which come back year after year, and take some time to get going and blooming. An annual that you can still plant now and is available at the nursery still in Salvia. Hummingbirds are especially attracted to red salvia. Once the red salvia begins to grow in they will flower continuously and provide plenty of food for the hummingbirds until they fly south in the fall.

Asiatic Daylily Red Bee Balm (monarda)
Yellow Daylily Columbine
Orange Daylily Yellow Daylily
Yellow Daylily Maroon Daylily
Yellow Daylily

Red Salvia

A Gourmet Hamburger?

Gourmet Hamburger RecipeIf we were to survey a hundred people and ask them to name a gourmet food, the chances that a hamburger would end up on that list are between zero and nil. So what’s the deal with the name of this article? Durkee Seasonings has a new seasoning blend named Gourmet Burger Seasoning and it’s quickly become our favorite way to season our grilled hamburgers. And even though salt is the first ingredient in the ingredients list, there really isn’t too much salt in the mix. I’d know because I haven’t used salt in cooking in years.
There’s two ways to use Durkee Burger Seasoning, mix the seasoning in with the hamburger meat, and then form the burgers, or to simply sprinkle on the hamburgers before cooking (or right before serving, which makes 3 ways, I think). My preference is to mix the seasoning into the meat before cooking. If you’re using pre-made frozen burgers your choice is limited to sprinkling the burger seasoning on the hamburgers. Either way results in a delicious tasting burger, and I feel the blended in method results in a more deeply seasoned hamburger.

When mixing the seasoning into the hamburger use about 2 tsp of seasoning per pound of lean ground beef. Add 1/4 tsp of Tabasco Sauce if desired. For food safety reasons, always cook hamburgers to 170° F (medium well). We like to serve our grilled hamburgers on toasted Kaiser rolls, along with Cheddar cheese, sliced pickles, and condiments like ketchup, mustard and mayonnaise. Side dishes that go well with this meal are macaroni salad, cole slaw, potato salad, or a tomato-cucumber salad. If you’re having a weekend barbecue party, you might want to make all of the salads so your gets can choose their favorite.

Delmarva Crab Cake Recipe

Tags: , ,

Prepared Delmarva Crab CakeWe have a few crab cake recipes on our web site. On our Old Bay Crab Cake Classic page are links to many of our favorite crab cake recipes.
Our absolute favorite is the crab cake made with Old Bay Crab Cake Classic. We enjoy this crab cake for two reasons. First and foremost because it absolutely tastes great. Second, because it’s easy to make. Mix the seasoning with crab meat, and a little mayonnaise, then cook. It’s that easy.

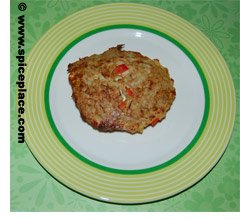
But sometimes we’re looking for a change of pace and so last night we made Delmarva Crab Cakes which you can find a link to on the Old Bay Crab Cake Classic page. This recipe is a little different then most crab cake recipes because it uses bell pepper in the ingredients. We chose to use red bell peppers since that’s what we had on hand. Note that the Delmarva Crab Cake recipe calls for using 2 pounds of crab meat, so if you are like us and only use one container of crab meat, you’ll need to cut quantities in half.

Our Delmarva Crab Cake recipe made a delicious set of crab cakes. We found we needed to broil them a little longer then the recipe called for. Maybe 12 minutes to the first side and 4 minutes to the second.

We have one other crab cake recipe worth sharing and it’s the Old Bay Crab Cake Recipe that is essentially the the same tasting crab cake as you’ll get from making the crab cakes with Old Bay Crab Cake Classic, except you do the labor and break up the bread pieces. It’s an excellent crab cake, no doubt about it.

Canadian Seasoned Ribeye Steaks for the Barbie

Barbecued Canadian Steak RecipeSummer weekends seem destined for barbecuing outdoors. By cooking outdoors, we don’t add any additional heat to our homes, and the barbecued foods we make take on additional flavor from the grill cooking. Plus it’s a great opportunity to use our deck, and enjoy the company of our family and friends.
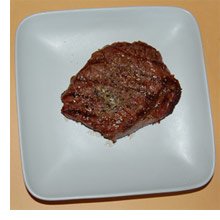
The most frequently outdoor grilled foods are steaks, hamburgers, hot dogs and chicken pieces. We often venture beyond the usual and regular readers of our blog know we’re not afraid to cook beef roasts, pork roasts, whole chicken, and ribs. But, today we’re making a recipe that’s straight forward, Canadian Seasoned Rib-eye steaks. If you’re a new barbecuer, this is a great starting recipe and is about the easiest barbecue recipe around. At one time we’d eat one of these ourselves, but nowadays, we split the steak with another person.

We don’t have a gas grill and always cook on our Weber kettle grill. We prefer the charcoal cooking over gas grills and also love the more basic cooking method of charcoal. It’s hard to explain, but I think there’s a feeling of pride in being able to cook well outdoors with basic unregulated cooking appliances like the Weber. There is a raw naturalness to it, that doesn’t exist in our everyday modern lives.

So light the barbecue, you’re welcome to use your gas grill. When the grill is ready, sprinkle the Ribeye Steaks with Canadian Steak Seasoning, and grill them close to but not right over the coals for about 5-8 minutes for the first side, and 4 minutes on the other side. Cut the steak to check for doneness, and continue cooking if needed. Sprinkle a little more Canadian Steak Seasoning just before serving. There’s no need for barbecue sauces with this recipe. Simply cook, season, and serve.

A Simple Homemade Potato Salad

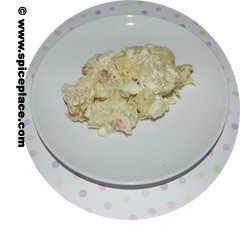
Potato Salad RecipeWe enjoy having potato salad along with our summer barbecued foods like hamburgers, and chicken. Somehow the taste of potato salad blends with the barbecued foods. Occasionally we have found some prepared potato salad with a nice taste. But that’s hard to find as storage, preservatives, and mass production all are detrimental to the flavor.
So we prefer, most of the time, to make our own potato salad. We know it’s fresh, limit the amount of salt we add, and enjoy knowing the potato salad was a result of our own efforts. We’ve never entered this recipe in a contest, but all of our friends rave over it when we serve the recipe at holiday weekend barbecues.

Easy Potato Salad Recipe

  • 2 pounds of red skinned potatoes
  • 2 eggs
  • 3/4 cup light mayonnaise
  • 2 tbsp dried cilantro
  • 1/8 tsp white pepper
  • 2 tbsp lemon juice

To make Easy Potato Salad

  1. Fill a large pot with water, and bring to a boil.
  2. Add the red skinned potatoes.
  3. Cook for 12 minutes, then add the 2 eggs in shell to make hard-boiled eggs.
  4. Cook for another 12 minutes. Drain, cool, then refrigerate the potatoes and eggs for 3 hours.
  5. Peel the potatoes if desired. Cut the potatoes into 1/2″ chunks and place in a large bowl.
  6. Peel the hard-boiled eggs, cut into 1/4″ slices, and then crumble the eggs over top of the potatoes.
  7. Combine the mayonnaise, cilantro, lemon juice, and white pepper in a Pyrex measuring cup.
  8. Mix a little dressing at a time into the potatoes. Keep adding more dressing until the potatoes are well coated with the mixture.
  9. Cover and refrigerate at least 1/2 hour. Mix and serve.

Try this Cool Cucumber Tomato Salad this Summer

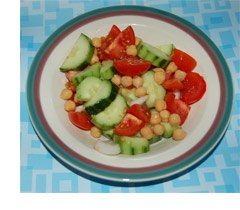
Summer brings us lots of fresh fruits and vegetables from our garden. One of our favorite garden fruits is the tomato. There’s something special about eating the fruits of your own labor, and the tomatoes we grow in our garden are picked fresh from the vines and are loaded with flavor. We often just eat tomatoes like a peach, fresh from the vine, with a little fresh basil.
While things are just getting going in our garden, the grocery stores are filling with fresh farm produce which is about as close to home raised as possible. Of course that depends on the quality of the produce buyer at your local grocer. The trend these days has been toward local grown produce, and grocery stores are pushing the quality of their produce offerings. But unless you live in the deep southern US, or in California, the odds are that tomatoes, and cucumbers sold in the store in June are not local and have been trucked in.

One of the simplest salads we enjoy with these two vegetables is Cucumber Tomato Salad. This recipe only takes about 5 minutes to prepare.

Cucumber Tomato Salad Recipe

  • Fresh Tomatoes
  • Fresh Cucumbers
  • Diced Onion
  • Chilled garbonzo beans (chick peas)
  • Italian Salad Dressing

To make Cucumber Tomato Salad
The amounts of tomato and cucumber varies depending on the size of the fruit. Allow about 1 cup chopped tomato, 1 cup diced cucumber, and 2 tbsp diced onion per serving. The cucumber and garbonzo beans should be chilled and the tomato should be at room temperature

  1. Diced the tomatoes into bite sized pieces.
  2. Peel the cucumber, cut in have lengthwise, then slice into 3/8″ thick slices. You can leave a little peel on for added color.
  3. Peel and dice about 1/2 cup onion.
  4. Combine the tomato, cucumber, and onion in a salad bowl. Add a little Italian Salad Dressing and mix well.
  5. Add the garbonzo beans if desired. Or serve on the side for others to add on there own.
  6. Do not refrigerate or you will destroy the flavor of the tomatoes. Serve immediately.

Simple seasoned shrimp recipe

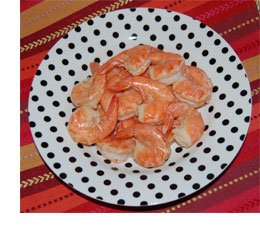
Picture of Easy Shrimp RecipeThis is perhaps the easiest recipe we’ve posted since we started our Cooking Blog about 7 months ago. It’s so easy it feels like we’re cheating.
All you need is 2 pounds of thawed precleaned, cooked shrimp, 2 tbsp vinegar, and 1 tbsp Old Bay Seasoning. Drain off any water from the shrimp, and place in a microwave safe bowl. Add the vinegar, and Old Bay Seasoning. Stir to mix the seasonings around and distribute over the shrimp. Microwave for about 2 minutes. Check to see if hot. Stir, and heat longer if needed. Serve with Cocktail Sauce.

Hungry? Here’s a Delicious Maryland Grilled Whole Chicken Recipe

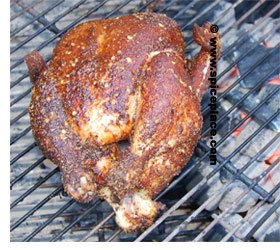
Picture of Maryland Grilled Chicken on a weber grillOften when we season foods for the grill we consider using spice blends like McCormicks Grill Mates and Durkee Grill Creations. While those are excellent seasonings, we like variety in our cooking and often wander off the beaten path and venture into our own seasoning wilderness. So yesterday, we came up with this recipe for Maryland Grilled Whole Chicken.
If you’re familiar with Maryland, you’ll know that it’s one of the largest producers of chicken in the world, and is home of the famous Perdue brand of chicken. Just as the Carolinas are known for their barbecued pork, Maryland is known for grilled chicken. During the summer weekends, the local benevolent societies like the Elks, Moose, VFW, and churches set up outdoor barbecues on roadsides where they serve grilled chicken. I can smell the chicken cooking now.

This chicken is seasoned with a dry rub and then basted frequently with a seasoned mop sauce. It’s cooked indirectly, and turned around everytime it’s basted so it’s cooked evenly. While we made a whole chicken, this recipe can easily be adjusted for chicken pieces by simply adjusting the cooking time.

Mop Sauce Ingredients

Dry Rub Ingredients

To make Maryland Grilled Whole Chicken

  1. Place 25 to 30 Kingsford charcoal briquets on one side of a coverable grill. Apply lighter fluid, and light the charcoal.
  2. Mix up the mop sauce in a 2 pint Pyrex measuring cup, or other glass container.
  3. Place the dry rub ingredients in a 1 gallon zipper storage bag.
  4. Wash and pat dry the chicken, place the chicken into the storage bag, and shake to evenly coat the chicken with the dry rub.
  5. When the grill is lighted, place the chicken about 6 inches away (horizontally) from the hot coals [don’t place the chicken over the coals] so that the chicken cooks slowly. Baste with an initial coat of th mop sauce. Cover the grill and close the vents to about 1/2 way.
  6. Baste with the mop sauce every 15 minutes. Rotate the chicken at each basting of mop sauce to cook the chicken evenly.
  7. Cook for about 1 1/2 hours. Check for doneness with a meat thermometer. The temperature should read 175° F when done.
  8. Remove from grill, and let rest about 10 minutes before slicing.

Serve with your favorite barbecue sauce.

If cooking chicken pieces, cook them indirectly as well, and turn and baste at 15 minute intervals.

North Carolina Pulled Pork Sandwich

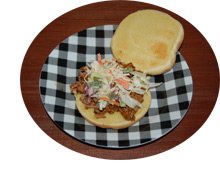
Carolina Pull Pork SandwichToday we felt like slow cooking on the barbecue, and decided to make a genuine Carolina Pork Loin. We chose a 3 pound pork loin for our roast — instead of the typical pork butt [pork shoulder] roast most typical of this recipe. Our choice of a pork loin over pork butt was mostly because of the lower fat in the pork loin. The pork butt will shred better, but as you can see below the pork loin made a great pulled pork sandwich. Chose the roast the suits your taste and diet. We lean toward the leaner cuts of meat.
Now you can’t rush a Carolina Pork Roast. It is a very slow cooked recipe, cooked either in a smoker or a covered grill over indirect heat. It’s a 4 – 6 hour long adventure that ends in a sensuous delight. We cooked our Carolina Pork Roast on our Weber kettle grill with indirect heat using Kingsford charcoal briquets. We chose the Kingsfords briquets over lump charcoal because of the long burning time we needed.

Our Carolina Pork Roast recipe uses two different steps in seasoning. First, we coat the roast with a dry rub made up of simply pepper, paprika, and sugar. Then we baste the roast every 20 minutes or so with a mix of red pepper flakes, sugar, and vinegar.

Recipe for North Carolina Pulled Pork Sandwiches

Dry rub

Mix together in a large zipper storage bag. Set aside.

Basting Sauce

Combine in a 2 cup Pyrex measuring cup, or some other glass container. Mix until sugar is dissolved. Don’t be afraid of the amount of red pepper, the vinegar will neutralize most of the heat. The pepper itself will form thicker and thicker layers on the roast as you baste and will keep the pork roast moist as it cooks slowly.

To make Carolina Pulled Pork Sandwiches

  • Dry Rub (above)
  • Basting Sauce (above)
  • 3 pound pork loin roast
  • Your favorite barbecue sauce
  • Kaiser rolls
  • Coleslaw
  1. Place about 20-25 Kingsford charcoal briquets in a pile on one side of your grill. Using charcoal lighter fluid, light the coals.
  2. While the charcoal is getting started, mix the dry rub and the Basting Sauce together.
  3. Place the pork roast in the zipper storage bag, seal, and shake to evenly coat the roast with the Dry Rub.
  4. When the coals are going, place the pork roast about 6 – 8 inches from the coals (if using a Weber grill, the coals should be on one side, and the roast close to the center). Apply a first basting of the Basting Sauce on the roast. Cover, close the vents to about half way. We want this to cook a long time (4 to 6 hours) over slow heat (about 200° F.)
  5. Baste the roast every 20 minutes with the basting sauce.
  6. You’ll need to add at least one more load of charcoal to be able to cook the length of time required. When the coals are half way burnt, and another 20 – 25 briquets. Repeat one more time if needed. The coals should be slowly burning so if they’re going fast, close the vents some more. We cooked our roast for 4 1/2 hours and only needed one refill of the briquets.
  7. As you baste the roast, you’ll notice the red pepper is building up on the roast. This coating will absorb the basting sauce and keep the roast moist.
  8. We like to keep a can of water on the grill over the coals to add moisture to the covered grill.
  9. Turn the roast around [and not over] every hour or so, so as not to overcook any one side of the roast.
  10. Check for doneness with a meat thermometer. The temperature should be 175° F when done.
  11. Remove the roast from the grill, and place on a large cutting board. Scrape off the red pepper.
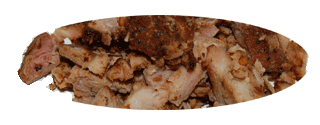
  12. Chopped Carolina porkChop the pork roast into 1/2″ to 3/4″ size chunks using a heavy meat cleaver. A cleaver is the best method of doing this task.
  13. Toast the Kaiser Rolls.
  14. Mix the chopped pork with some barbecue sauce such as Kraft, Open Pit or KC Masterpiece. Don’t overload the sauce, mix so that you’re adding about 1 1/2 tsp per 1/3 cup serving of meat.
  15. Place the pork on a toasted Kaiser roll, and top with coleslaw (we’ll post a recipe for excellent coleslaw soon).
  16. Serve with coleslaw on the side.