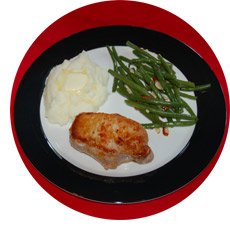
 Boneless center cut pork chops are an excellent choice for a simple, and easy to make dinner. Because many pork producers raise pork in overcrowded conditions, we try to buy humanely raised pork products when possible. Locating stores that sell organic and humanely raised pork is a bit difficult. We’ve had some success with Super Fresh, and Weis; you can usually find organic pork at a Whole Foods market, but if you have a local butcher, you could ask if the pork is raised local. Many local farmers will raise and sell pork that are raised in a comfortable setting.
Porks chops can be cooked in a variety of ways including pan fried, broiled, baked and grilled. We have a couple of excellent baked pork chop recipes which we’ll share in future posts. Todays recipe is for Buffalo Seasoned Pork Chops that are pan fried. These will go from refrigerator to table in about 15 minutes, so this is a great weeknight meal idea.
We chose to serve our pork chops with a vegetable of green beans and almonds, and buttered mashed potatoes.
Buffalo Seasoned Pork Chops Recipe
- Lean centercut boneless pork chops
- Durkee Buffalo Wing Seasoning
- Season the pork chops liberally with Durkee Buffalo Wing Seasoning
- Pan fry in a non-stick skillet about 8 – 10 minutes per side until the pork chops are cooked thru.
- Meanwhile, cut and prepare the green beans by steaming for 8 minutes, and then mixing in about 1-2 tbsp of Almond Slivers. Also, prepare mashed potatoes by following the package directions.
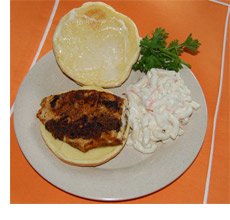 We like to keep frozen farm raised catfish around in our freezer. They’re an easy main dish to make, and can be used in a wide range of recipes such as breaded deep fried, grilled, baked and pan fried. Plus eating fish is part of a healthy diet. So, as a quick weekend lunch we often make Cajun Catfish Sandwiches served with Macaroni Salad. If you have a microwave, and the prepared macaroni salad, this meal goes from freezer to plate in about 15 minutes.
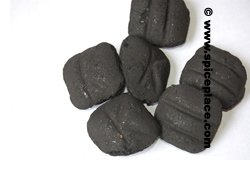 When asked what charcoal is, many folks would describe Kingsford charcoal or the knock offs of Kingsford. Kingsford is a fine quality charcoal, and is made with hardwoods, ground, then bound together and pressed into briquets. Kingsford’s origin comes from the Ford Motor Company, and the product was created to find a use for all of the scrap lumber from the production of Ford Automobiles. We use Kingsford all of the time, and don’t bother with the knock-offs as we find the knock-offs are inferior to Kingsford.
 We’ve been trying to perfect Jamaican Jerk Chicken and have come to realize that the secret is in preparation and planning. We bought a bunch of chicken breasts and chicken thighs, and decided to try making the Jamaican Jerk Chicken two ways. The first way was straight following the recipe on the package of
 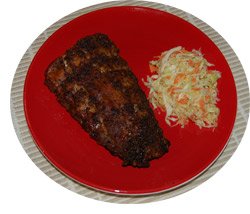 Here’s one of our favorite ways to make pork ribs that are simply marvalous. The secrets are slow cooking, and Grill Mates Mesquite Seasoning from McCormick. You should plan on cooking these slowly for 3 hours. Make sure to keep water in the cookie sheet so that the ribs stay moist. And for safety, take the ribs off the rack but leave the cookie sheet in the oven to cool before removing so you don’t get burnt by the hot water.

 This is a recipe for a deliciously different beef stew made using Old Bay Seasoning. The ingredients are for the most part the standard beef stew items. The difference in this recipe is the seasoning, which is, of course, Old Bay. We love Old Bay Seasoning, and are always seeking new uses.
 Since spring is here, and picnic season is right around the corner, we thought we’d share our world class Deviled Eggs recipe. This is a recipe of one of our employees, and they are always a hit when we have pot luck luncheons.
  This recipe for Garlic Tabasco Mashed Potatoes is a treat. That is, of course, if you like garlic like we do. This recipe isn’t too garlically in taste, and the Tabasco Sauce adds its own twist to the flavor of the mashed potatoes.
 Spaghetti sauce is a good weeknight meal because you can go from idea to table in 30 minutes. You don’t need to buy the expensive prepared sauces from the grocery and can make a better sauce at home almost as quick. We’ve seasoned our sauce in the recipe below using McCormick Spaghetti Sauce Mix, but you can feel free to replace the mix with 1/4 to 1/2 tsp basil leaves, 1/4 to 1/2 tsp oregano leaves, 1/8 tsp black pepper, and about 2 tbsp whole wheat or white flour [as a thickener]. We simply find the mix is a little easier to use as all of the ingredients are in the proper proportions already. Note in the pictured recipe we used whole wheat spaghetti noodles for the pasta.

