 We like to have breakfast sausage every once in a while. Yet often the brands at the grocer are laden with fat. We do know of
that is fairly lean, but most store bought sausage is very fatty. It seems the manufacturers often can resist the tendency to want to use up the fat and make something off it. Often you hear that the fat is required for the taste. We haven’t found that to be the case at all, and make our own sausage using store bought ground pork.
Sometimes we find a nice looking pork butt roast, remove as much fat as possible and then grind it up ourselves in our meat grinder. This is a great way of really making sure the butcher isn’t trying to make something off their fat just like the sausage manufacturers do! If you don’t have a meat grind though, you can ask your butcher to trim off the fat before grinding the pork butt, and tell them you’ll pay for the fat on the side. Personally, I like being in control of the grinding and making absolutely sure I can get rid of as much fat as I can. An honest butcher will do as you ask and make you a nice lean ground pork.
We happen to have a sausage stuffer too and sometimes make stuffed breakfast sausage. It’s a lot of work to stuff your own sausage and yet it’s rewarding since you know what’s in the sausage isn’t loaded with fat. This article is about make homemade sausage patties so we’ll reserve the discussion on making sausage links for a future article.
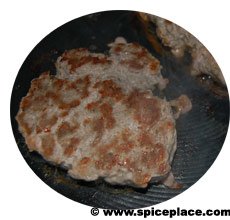
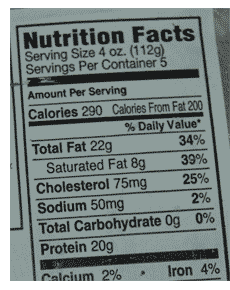 We started our homemade breakfast patty sausage using store bought ground pork. According to the nutrition facts on the pork, the amount of fat per 1/4 pound of ground pork is 22g which is 34% of the daily value. Readers might think that value is high, but that amount is for a 4 ounce serving. The typical fat content of packaged breakfast sausage is 22g per 2 oz serving, so the fat in our homemade pork sausage is about half of the fat in prepared sausage. The proof of this is in the picture above of our sausage cooking in the skillet. Take a look closely and you’ll see that there is no excess fat around the sausage. Keep in mind too, that we’re using store bought ground pork and the butcher just can’t resist the opportunity to get $4.00 a pound for fat. If we ground our own pork, and removed all of the visible fat then we could easily have cut the fat in half again.
What you need to make homemade sausage patties
1 to 1 1/4 pounds lean ground pork
1 tbsp very finely diced onion
1/4 tsp ground white pepper
2 tbsp parsley flakes
1 tsp ground sage
1/4 tsp chervil
1/4 tsp marjoram
1/4 tsp savory
1 tbsp water
Place all of the ingredients in a large bowl and mix well with your hands. Form into 5 to 10 patties depending on your preference. Cook over medium low heat in an ungreased non-stick skillet until browned, turn and brown the other side.
Make sure to notice how little fat is left in the pan when you’re done cooking these patties.
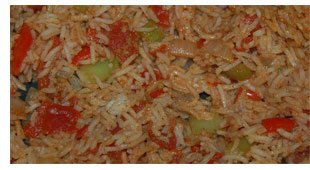 Continuing with our latest theme of homemade recipe replacements for store bought packaged foods. The recipes we’ll feature in this series will be simple to make and tasty too.
  When we cook our meals we try to avoid using salt or MSG in our recipes. When making side dishes from the packaged foods that come in boxes or cans, the seasonings are all mixed together and it’s almost impossible to cook without salt. By looking closely at the USDA Nutrition Facts label you’ll see these packaged foods are all laden with salt – many of which contain more than 25% of the recommended daily value of sodium in a single serving.
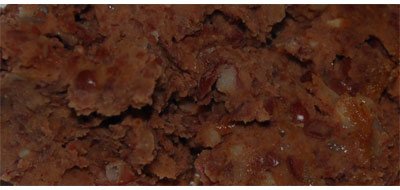
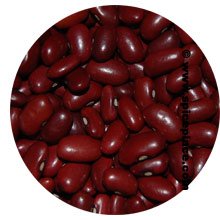 Refried Beans starts with Pinto Beans, a small red bean typical in Latin American cooking. We purchase ours at a Latin American Grocer, but if you can’t find a Latin American Grocer near you, buy the red beans in the Mexican or Latin American section at your grocer.
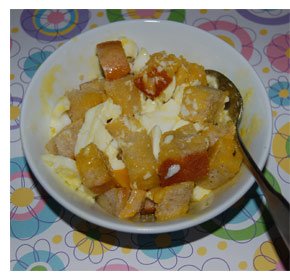 Breakfast time continues here in our Cooking Ideas sections with an Old Fashioned recipe for soft boiled eggs on toast cubes. Nowadays, you don’t hear or see soft boiled eggs around much. But they’re yet another way to add variety to your morning breakfast meal. You can buy special holders to place the soft boiled egg in and eat the cooked eggs right out of the shell along with toasted bread, or you can try this our way.
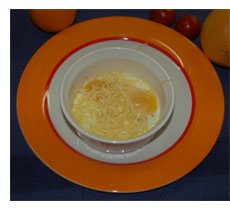 If you’ve never tried baked eggs before you might find the thought a little odd. While it takes a longer to make baked eggs, you’ll find that the texture of the baked eggs is much different then you get from fried eggs, almost like that of hard boiled eggs. It’s easy to make baked eggs, but you’ll need to have a couple if items to do so. First, you will need an oven safe ceramic bowl, such as a ramekin or a small Corning Corelle dish. Second, you’ll need an 12″ x 9″ x 2″ baking pan that you’ll fill halfway with water.
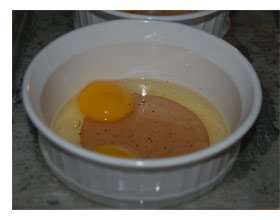 To make baked eggs, place a 12″ x 9″ x 2″ pan on the middle rack of your oven, and fill the pan half way with water. Preheat the oven to 350° F. While the oven is warming, lightly grease a ramekin or other oven safe small dish. You may add a round piece of ham or Canadian bacon to the bottom of the dish if you like. Then break 2 eggs into the ramekin, and place the ramekin into the pan of water. Bake about 20 to 25 minutes, until the eggs are set on top. Don’t try to rush the baking. Let them cook slowly in the water until the whites and yolk are firm. Then carefully remove the ramekin from the pan, leaving the pan of hot water on the rack in the oven (DON’T TRY TO CARRY THE PAN OF HOT WATER – LET IT COOL BEFORE REMOVING THE PAN). Immediately sprinkle the top of the eggs with grated white or yellow Cheddar cheese, and serve. Make one ramekin per serving, and you can fit 2 ramekins into the pan of water.
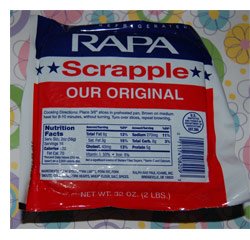 The name scrapple was derived from the the word scraps. Originally scrapple was created to make use of the scraps of hog left over after butchering and certainly it still is. It’s made by boiling neck bones in seasoned water along with other odd parts of the hog for a few hours until the meat falls off of the bones. The meat is chopped up, and then mixed with seasoned cornmeal mush, and baked until firm. Here’s a
  Some folks are turned off by thinking about what goes into scrapple, and consider it nasty food. But nothing could be further from the truth. It’s a tasty meat dish that makes for change of taste in your breakfast meals. The official ingredient list on the package of Rapa Scrapple lists: Pork Stock, Pork Livers, Pork Fat, Pork Snouts, Corn Meal, Pork Hearts, Wheat Flour, Salt and Spices. It is not a low fat food though and like sausages needs to be eaten in moderation. According to the Nutrition Facts, each serving of scrapple contains 8g or 12% daily value of fat. That’s not lean, but is only a fraction of the fat found in fat dogs (hot dogs) which many labels state the daily value of fat at 38% [and don’t even look at the label on a package of bacon if you’re concerned about the fat in scrapple].That said, I try to eat right, and so I may eat scrapple only once every 2 to 3 months.
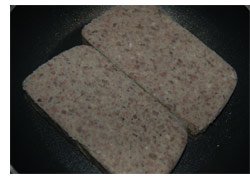
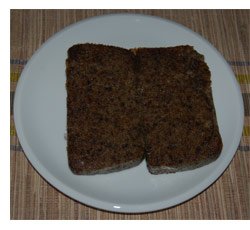 Scrapple can’t be rushed, nor cooked in the microwave. It needs to be pan fried until the bottom has browned, and turned only once, and cooked until the bottom on the other side has browned too. If you turn the scrapple too early, then the slice with fall apart (it is made with corn meal so will be a rather mushy mess in this case). If you cook scrapple too long, then the outside will be hard, and the inside will be mushy which makes it difficult to eat. Our picture here of the cooked scrapple shows the right level of browning. The outside is brown, and yet still soft enough to cut with a fork.