Category: Cooking Ideas

Buffalo Chicken Thighs Recipe

Buffalo Chicken Thighs Recipe
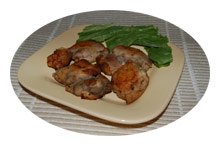
We have this wonderful recipe for Buffalo Chicken Wings that came from a Buffalo Wing Joint in Buffalo, NY, and last week we thought we would try out the recipe using chicken thighs instead.

We choose chicken thighs because we feel they have more flavor that chicken breasts and thought that would make a nice meal. We also used boneless-skinless chicken thighs to reduce the amount of fat in this meal. Reducing the fat was part of our thinking to using chicken thighs instead of chicken wings for this meal.

We didn’t change the recipe for the marinade for the original Buffalo Wing Recipe and placed the chicken thighs into a large ziploc bag, and poured in the marinade. The marinade will easily season 5 pounds of chicken thighs in this manner. Place the bag of chicken thighs in the refrigerator, and let the chicken marinade in the Buffalo Wing Marinade for at least three hours, turning every 30 minutes to let the marinade season the chicken thighs evenly.

To cook the chicken thighs, remove the thighs from the ziploc bag, and place in a large baking pan that has had the bottom covered with non-stick aluminum foil (this is important, use non-stick foil). Bake in a 500° F oven for 30 – 45 minutes, depending on the size of the chicken thighs. When the thighs are done, remove from oven, and serve with carrot sticks, celery sticks, and blue cheese salad dressing.

Using a charcoal chimney to light charcoal

Using a Charcoal Chimney

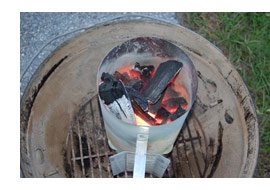
Up until recently, we’ve always relied on charcoal lighter fluid to light our charcoal. And we’re charcoal enthusiasts, so all we cook with is charcoal. We’ve watched a few of the Dutch Oven and Camp Cooking shows with Cee Dub which is shown on RFD-TV and noticed he always used the charcoal chimneys to light the charcoal for his dutch ovens. So we were out shopping one day last summer, and noticed a charcoal chimney section at the local store, and bought one. This was the best find for the summer barbecue. In our pictures here, we are using Cowboy Brand Hardwood Charcoal. The same method works with Kingsford or other lump charcoal brands.

Here’s how to light charcoal using a Charcoal Chimney
Picture of Bottom of Charcoal Chimney LighterA Charcoal Chimney charcoal lighter is a metal tube about 12 inches long, and 6 inches in diameter. The bottom of the Charcoal Chimney has vents, and a grate sits about 2 inches above the bottom. In the bottom of the Charcoal Chimney, under the grate, you place some crumbled newspaper under and the top of the grate supports the charcoal. In our picture here, you can see we’ve placed some crumbled newspaper in the section of the charcoal lighter that’s under the grate.

Picture of Charcoal Chimney Getting Started
Place the charcoal chimney on a fire proof surface before you light it. We use the bottom grate of our Weber grill. Light the newspaper through the vents in several places. If you are in a location where it’s really windy (15 – 20 mph), a little bit (1/2 oz) of charcoal light fluid can be poured onto the newspaper to help get it started. We use that method when we’re cooking lunch on the beach. In most cases, a simple lighting in 3 or 4 places will do. The newspaper will smoke, burn slowly, and the heat from the newspaper will be funneled up the chimney, and heat the charcoal to light it. In the picture to the right, you can see the smoke from the newspaper rising from the Charcoal Chimney as the newspaper heats the charcoal. It takes 10 – 15 minutes to start the charcoal. Perhaps a little less time if you’re using Cowboy Brand hardwood charcoal.
Picture of Chimney Lighter
As the charcoal at the bottom of the chimney lights, it will add more heat to the rising column of heat going up the chimney, and will light the charcoal all the way to the top. Here’s a picture of the charcoal all ready to be dumped out onto the charcoal grate. The handle of the chimney is made of wood, and has a heat shield to protect your fingers. Even with those safety factors, please use caution when dumping the charcoal out of the chimney onto the grate of your grill as the chimney itself will be very hot. You should also have a place to set the very hot charcoal chimney on after you empty the charcoal from it as it will be very hot for many minutes.

We’ve had great success using our charcoal chimney to light our grill, and wish we had found this magic device 10 years ago.

How to Make a Ham and Cheese Omelet

We enjoy making breakfast on the weekends. It’s a nice break to take the time to cook in the morning instead of rushing to get to work. And so while we always try to vary our diet and to cook different meals, one we have quite often is the good old Ham and Cheese Omelet. I learned to cook this dish when I was in the service and had to help out in the kitchen. For the most part the work in making a ham and cheese omelet is in the preparation. So here is how we make a ham and cheese omelet for two.Ham and Cheese Omelet

Making a Ham and Cheese Omelet
Start with 3 free range chicken eggs*. Break the eggs by rapping them on the kitchen counter, and drop the egg white and yolk into a small bowl. Repeat for the other two eggs. Some cooks crack eggs on a sharp edge but we feel that increases the chance of getting shell into the eggs. Once you’ve got all 3 eggs in the bowl, use a fork to beat the eggs vigorously for 10 – 15 seconds until the whites blend with the yolks to an almost even yellow color.

Take two slices of luncheon ham such as DAK. If using large ham slices from the deli counter, adjust down to one slice. What you want is to end up with about 1/3 cup of chopped ham. We simply place the ham on a cutting board, and cut long ways across several times about 1/2 inch apart, rotate the cutting board, and cut the short way across at 1/2 inch widths. The end result should be a pile of ham chunks containing about 1/3 cup of ham. We’ve also had wonderful results using leftover dinner ham slices that are about a 1/2 thick. If you’re using that type of ham, then make the cubes of ham about 1/4 inch wide instead. Once we used a dinner ham slice that we had for dinner and had been cooked with pineapple. That made a very nice tasting omelet.

The final ingredient you’ll need for the ham and cheese omelet is Cheddar cheese. You might be tempted to use American processed cheese, but in our opinion, real Cheddar cheese is best. You may use pre-shredded Cheddar cheese, shred it yourself on a grater, or use slices of Cheddar. All will produce a nice omelet since the cheese is going to melt and spread. Using shredded Cheddar helps you somewhat since you can spread it evenly, but sliced Cheddar works fine. For our omelet, you will need to have about 1/3 cup shredded Cheddar cheese or 1 1/2 to 2 slices of Cheddar cheese.

Time to cook the omelet
Now that everything is prepared, place about 1/2 to 1 tbsp of olive oil or canola oil in a 9″ non-stick skillet, such as T-Fal. Using the corner of a paper towel, spread the oil around in the pan. Then place the pan over low heat. Beat the eggs another time for about 5 seconds, then add to the pan and make sure the eggs run over the entire bottom of the pan. Cook the eggs over low heat until the top sets up.

We’re going to fold the egg over on top of itself to form a half circle. So add the ham to only one half of the omelet. Which ever side you choose will become the bottom of the omelet. [Note: You’re going to be tempted to over fill the omelet with lots of ham and cheese, but resist the temptation. You only need about 1/4 cup to 1/3 cup of each to make a nice omelet]. Top the ham with the Cheddar cheese, then carefully, using a spatula flip the other half of the omelet over top of the half of the omelet with the ham and cheese on it. You should make sure the omelet is loose from the bottom of the pan first by slipping the spatula under the omelet all the way around. Once you flip the egg over top of the ham and cheese, let the cheese melt about 20 seconds before serving.

We cut the ham and cheese omelet in half to make two servings.

We served the omelet in the picture with Old Bay Hash Brown Potatoes and a glass of orange juice.

*We always buy free range chicken eggs because we feel it’s inhumane to place 7 chickens in a 7″ x 8″ cage as is done in non-free range chicken farms. Certainly free range eggs cost more than factory produced eggs, but the chickens are living creatures so we choose not to support low cost inhumane farming practices.

About Cinnamon

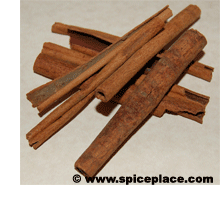
Cinnamon StickCinnamon, perhaps one of the most popular and tastiest of spices (although many don’t think of it as a spice), is a substance which many enjoy on a daily basic but do not know much about. Despite its wide use throughout the world, especially in America, millions of people are not even aware of where it comes from.

Cinnamomum verum, also known as Cinnamon (the tree), is an evergreen ranging from ten meters high to fifteen meters. Cinnamon (the spice), is made from the bark of this tree. However, while producing its edible bark (after some preparation, of course), the tree also composes fruit, which comprise only of very small, purple berries. The berries are not the prime product of the tree that humans are concerned with. While the tree is only native to Sri Lanka, it has been cultivated commercially in many tropical countries including Brazil, Vietnam and Madagascar. Surprisingly, and contrary to the smell of cinnamon, the leaves of the tree give off a foul odor. The name “Cinnamon” is from Greek origin, but also has some Hebrew and Malaysian roots.

Besides making cinnamon spice itself, there is another thing that the bark of the Cinnamon tree is good for. That use is the creation of the cinnamon oil, which is made through a slightly complicated process. First the bark has to be pounded roughly, soaked in sea water, and finally distilled. The oil has a gold-like color, and smells very similar to regular cinnamon.

Cinnamon is not a spice that can be made hastily. The tree must be grown for at least two years before it can be coppiced, which is cutting off the shoot (the upper-portion of the tree) but leaving the roots, so a new shoot can grow. The severed shoot is stripped of its bark; the inner bark is used to make the cinnamon while the outer bark is made into quills (cinnamon sticks) and sold. While many countries where the Cinnamon tree is not native (all other countries except Sri Lanka) produce it commercially, the Sri Lanka Cinnamon trees are believed to make the best cinnamon.

There are different types of cinnamon, and when people say the word “cinnamon” with no other description, the variety is assumed to be the pure cinnamon, or Ceylon Cinnamon. This is the Cinnamon that comes from the Cinnamon tree Cinnamomum verum. However, there is another type of Cinnamon tree, Cinnamomum aromaticum, which doesn’t produce the true cinnamon, but something very similar. This imitation cinnamon is called Cassia Cinnamon, and although it is not the “pure” kind, the majority of all cinnamon sold it in the United States is Cassia. Cassia Cinnamon is different from Ceylon in that it is stronger, thicker, and harder. The reason for this is that with Ceylon Cinnamon, only the inner bark is used to make the cinnamon, but with Cassia, all the bark is used (and it’s a different species of tree). While the sticks of the two cinnamon types are easily distinguishable, the ground form is not, although there are different techniques that can be used to figure out what is what.

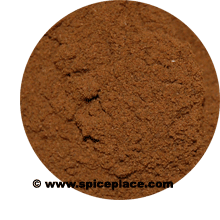
Ground CinnamonCinnamon can basically be put in any food. It is put in pancakes, eggs, cakes, chocolate, candy, and is even used to add extra flavor to fruits (apples, cherries, pears), and cereal. In the Middle East, it is put in other foods that many Americans wouldn’t think about adding cinnamon too, such as lamb. Besides being used heavily as a spice to make tasty foods even tastier, and add flavor to bland foods, it also has some medical uses. It can treat colds, and people used to believe it was a straight up cure for it. Cinnamon is also used to treat a variety of digestive problems, such as upset stomachs and diarrhea. Cinnamon is high in antioxidants, which are important in reducing damage that cells endure regularly. Many commercials promote the fact that their product is high in antioxidants, and cinnamon is no different. The oil that cinnamon has is antimicrobial, which kills or slows the growth of bacteria, viruses, and other things of the like. While this does little for the human body, when cinnamon is placed around other foods, it prolongs their life (how long before they come inedible). Studies have shown that cinnamon has great effects on people with Type II diabetes, but while the media portrayed the studies as showing that true cinnamon was beneficial, it was actually cassia that was used in the studies. Another fantastic use of cinnamon is its use as an insect repellant (kind of odd considering how good it smells). Many independent farmers do not like using insecticide because of its harmful side effects on humans, but cinnamon is a safe way to keep the bugs out and the crops safe.

The history of cinnamon is not a brief one. It dates back to as far as 2000 BC, and at that period was given as a gift to high leaders and rulers (it wasn’t as easy to make back then). Cinnamon is also mentioned many times in the Bible, adding to its value. In the Middle Ages, western world dwellers didn’t even know how cinnamon was made, as it was just exclusively imported from the other side of the world. Over the years, many different peoples dominated the spice trade (therefore the cinnamon trade as well). It was the Portuguese who actually discovered Ceylon is Sri Lanka, and they had a monopoly for over a century, and they fought hard to preserve it. However, the Dutch defeated them by making an alliance with another kingdom, and they completely expelled the Portuguese and used their own methods to produce and trade cinnamon. By the time Britain dislodged the Dutch, cinnamon was already declining in popularity and was spreading to other areas. Also, Cassia was becoming more popular, and Ceylon was no longer the only bark from which cinnamon was made.

About Old Bay Seasoning

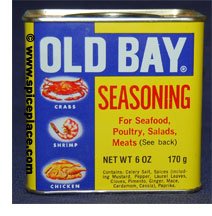
Picture of can of Old Bay Seasoning
Old Bay Seasoning has been a favorite in the state of Maryland for decades. Ever since it’s development in late 30s, many have been using it to enhance things from crabs to hamburgers. While the seasoning used to only be enjoyed by Chesapeake Bay residents, its mass production and popularity have allowed it to spread across the country. However, it will always be most popular in Maryland, famous for its crabs, but especially Baltimore, where crabs are eaten most frequently.

Back in 1939, a German immigrant named Gustav Brunn came to America, with the goal of starting a famous spice business. It was him who developed Old Bay seasoning with a primitive spice-grinder and a few basic ingredients. Because he was in Baltimore, and crabs were plentiful, people quickly took to his unique brand of seasoning, and Brunn got to live the American dream. He even named the seasoning after an old steamship line that served passengers and moved cargo on the Chesapeake Bay (Old Bay). It’s been over sixty years, and Brunn’s seasoning still enjoys moderate fame. Unbeknownst to many people, Brunn was one of the many Jews to escape from Germany after Kristallnacht. However, little else is known about the man who invented Old Bay.

Back when Gustav Brunn created Old Bay Seasoning, crabs were so plentiful in the Chesapeake Bay that bars often offered crabs for free, and seasoned with salty seasonings in order to sell more beer to the patrons. Old Bay is just one of these bar seafood seasonings, and is the seasoning that has survived the test of time.

Of course, Gustav Brunn does not make Old Bay Seasoning anymore. His company, The Old Bay Company was sold, and the company which purchased the rights to Old Bay is McCormick & Company [McCormick also a Baltimore, Maryland based spice company], which now manufacturers Old Bay and many variations of it. McCormick sells Old Bay across the nation through it’s distribution channels and has transformed a regional taste into a national product, almost certainly generating millions of dollars a year through their ventures. Besides the classic “Old Bay” seasoning which McCormick markets, the company also produces varieties such as “Old Bay with Lemon and Herb”, “Old Bay with Garlic and Herb”, “Old Bay Crab Cake Classic”, and many more. It’s for certain that McCormick will be here for a long time, perhaps making even new kinds of Old Bay, with new and possibly exotic flavors.
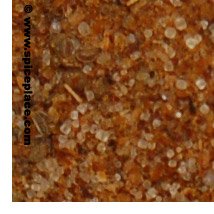
Picture of Old Bay Seasoning
What exactly is in Old Bay seasoning? It is a mixture of different herbs and spices; it contains a multitude of ingredients. If one doesn’t want to buy Old Bay seasoning, they can make it themselves! Old Bay contains mustard seeds, celery seeds, peppercorns, and much more. An official ingredient list for Old Bay seasoning follows:

Celery seeds
Salt
Mustard seeds
Whole black peppercorns
Bay leaves (Laurel)
Whole cloves
Dried Red Pepper (Pimento)
Ginger
Mace (the outer casing of the Nutmeg seed)
Whole Cardamom
Cassia
Sweet Hungarian paprika
Picture of ingredient list in Old Bay Seasoning

As the ingredients list shows, it is quite a tasteful and flavorful seasoning. Recipes for making Old Bay Seasoning at home can be found on the Internet, and many people have changed the recipe to customize it just for them.

Old Bay Seasoning is used for more than just crabs, much more. While as we’ve said Old Bay was developed for serving crabs in the bars of Baltimore, people put it on basically anything, such as popcorn (it would be hard to get the seasoning into a movie theatre though, ha), eggs, salads, fries, chips, hamburgers, other seafood, and more. It really can be used on anything, and there are even people who probably put it on pancakes in place of maple syrup! Of course, the majority of people use Old Bay to season their crabs, and other seafood, which is what it will always be predominantly used for. Old Bay not only brings out the full taste of crabs, but adds additional flavor to the dish. And with the right combination with other seafood seasonings, crabs can taste perfect.

Old Bay isn’t the only seafood seasoning, there are several other pretty famous ones. Another great seasoning is Nantucket Rub, which is used mainly for fish, but can also be used on meats such as chicken, and even on breads. The seasoning contains garlic, lemon zest, peppercorns, tarragon, and dill. It’s is named after how it is used; it is rubbed onto the food. Another fine brand is Zatarain [also produced by McCormick & Co.], which has produced many different kinds of seasonings. Most of the seasonings McCormick produces under the Zatarain line are meant to be used on seafood, and some are to be used exclusively on certain fish, such as shrimp. The Zatarain also includes products other than seasonings, and it is famous all over the United States. Another “Rub” seasoning is Bayou Rub, Cajun Seasoning, and Red beans & Rice. The Zatarain’s Cajun seasoning is used for blackening different meats, mainly poultry and seafood. It contains garlic, paprika, onion, black and red pepper, thyme, oregano, and lemon peel. When mixed with other seasonings, the result can be quite delicious.

Here is a recipe for a Maryland Crab Cake, which uses Old Bay Seasoning. The source of the recipe can be found here: https://www.spiceplace.com/best_maryland_crab_cake.php

1 lb fresh jumbo lump crabmeat
1 egg
1 tsp Worcestershire sauce
6 tsp real mayonnaise
1 1/2 tsp prepared mustard
1 tbsp chopped fresh parsley
7 tsp King Arthur all-purpose flour
1 tbsp Old Bay Seasoning

1. Mix all ingredients except the lump crabmeat.
2. Carefully pick through the crabmeat and remove any remaining shell and cartilage keeping as many lumps intact as possible
3. In a large bowl, gently mix crab and mayonnaise mixture. Shape into 5 or 6 cakes. Place shaped cakes on a cookie sheet covered with non-stick aluminum foil.
4. Broil about 10 minutes until tops begin to brown. Turn and broil other side 2 – 3 minutes.
5. Serve with tarter sauce.

Author: Matthew Schroebel

Stuffed Bell Pepper Recipe

Stuffed Pepper Recipe
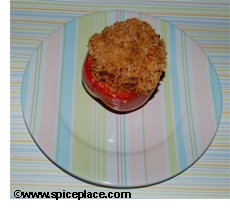
Since it’s summer and the vegetables are rolling out of the garden quite regularly, we thought we’d share a recipe of our for Stuffed Bell Peppers. We’ve enjoyed this recipe for years, and it’s been handed down a couple time throught our family. I’m sure we’ve made adjustments to this recipe over time, and this is our current formulation of Stuffed Bell Peppers.

Stuffed Peppers Ingredients
The number of steps listed below make this look like a complex recipe but honestly stuffed peppers are a simple meal to make.

  • 3 or 4 large peppers (We prefer red peppers because we feel they have a sweeter taste than green peppers but, they can be any color you choose.)
  • 1 pound lean ground beef (or ground turkey works as well)
  • 1 small onion chopped, finely
  • 1 tsp fresh chopped garlic (We prefer to use Nina’s chopped fresh chopped garlic because it’s so easy to use and for some reason imparts a better garlic flavor into foods)
  • 16 ounce can tomato sauce
  • 1/4 tsp fresh ground pepper
  • 1 cup uncooked basmati rice
  • 14 ounce can low sodium beef broth
  • 1/4 cup unseasoned fine bread crumbs
  • 2 tbsps Parmesan cheese, grated
  • 2 tbsps butter, melted

To make Stuffed Peppers

  1. Place beef broth in a saucepan and bring to a boil.
  2. Add the basmati rice to boiling beef broth. We prefer basmati rice and you’re welcome to substitute your favorite rice instead of basmati.
  3. Reduce heat to simmer and cook for 12 – 15 minutes.
  4. Cook lean ground beef (or turkey) with black pepper, chopped onion and garlic.
  5. While rice and beef are cooking you can cut the tops off the peppers and remove the seeds. If you want to speed up the cooking time at the end you can blanch the peppers first but cooking in boiling water for about 5 minutes.
  6. If necessary drain any grease from the cooked ground beef.
  7. Mix the cooked basmati rice with cooked ground beef.
  8. Add tomato sauce to beef and rice mixture. Only add enough to bind the beef and rice together. (Depending on what our mood is and what I have on hand in the pantry I may use tomato soup which is not as zesty as sauce or beef broth)
  9. Melt butter in a microwave oven.
  10. Add bread crumbs and Parmesan cheese to melted butter. This will create a crumb topping for the stuffed peppers.
  11. Place cooked beef and rice mixture into peppers.
  12. Top peppers with crumb mixture.
  13. Cook stuffed peppers for 1/2 hour at 350 degrees (if you blanched the peppers first) or for 1 hour at 350 degrees (if peppers were not blanched first.)

Popeye’s Cajun Rice Recipe

Popeye's Cajun Rice
Every time we go to the Popeye’s Chicken shop, we get their Cajun rice. We simply love it. So here’s our rendition of Popeye’s Cajun Rice. We make our Cajun Rice using Basmati rice which is different than the long grained rice used by the Popeye’s restaurant chain.

Popeye’s Cajun Rice

  • 1 cup Basmati Rice (you may substitute long grain white rice instead).
  • Chicken Broth
  • 1/2 pound chicken livers
  • 1/4 pound lean ground beef
  • 1/3 cup finely diced onion
  • 1/4 cup finely diced green onion (scallion)
  • 1/3 cup finely diced celery
  • 1/3 cup finely diced bell pepper
  • 1/8 tsp ground white pepper
  • 1/8 tsp Tabasco sauce
  • 1 tsp minced garlic
  • 1 tsp Gumbo File
  1. Cook rice according to package directions except substitute chicken broth for the water called for in the recipe. 1 regular sized can of chicken broth contains about 2 cups of broth.
  2. Brown the 1/4 pound of ground beef in a non-stick skillet. Break up fine while cooking.
  3. As you’re cooking the ground beef, also cook 1/2 pound of chicken livers in a pot of water. Cook about 10 minutes after the water begins to boil. Strain, then chop fine.
  4. Add the diced onions, green onion, celery, bell pepper, garlic, white pepper, Tabasco Sauce and Gumbo File. Saute until the onions, peppers, and celery are cooked, about 4 – 5 minutes.
  5. Add the cooked rice and chopped chicken livers, and stir together. Heat for about 2 minutes, then serve.

Dinner idea; Savory Oriental Seasoned Chicken Wings

Oriental Chicken WingsFish sauce (or Nuoc Mam Nhi) is one of those seasonings that we don’t find as a standard item in most kitchens in America. There’s probably a lot of people that would toss it out simply because of the smell. But if you’ve ever eaten at a Chinese restaurant, the odds are you’ve ate this seasoning. To most Americans the smell of fish sauce would be a turn off, but when added to foods the smell vanishes and a delicious flavor results.
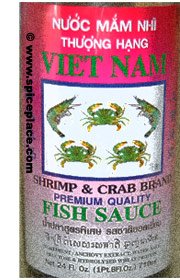

So here’s is a delicious Oriental Seasoned Chicken Wings recipe that gets it’s taste from two Asian sauces, fish sauce and oyster sauce. If you have neither of these in your kitchen cabinet then go out shopping for them at an Asian market, start with the lower priced ones first. Believe it or not, the lower cost fish sauces smell less.

Fish Sauce
Ingredients in Oriental Seasoned Chicken Wings

To make Oriental Seasoned Chicken Wings

  1. In a Pyrex cup, mix the soy sauce, fish sauce, oyster sauce, ginger, garlic, onion flakes, and sesame oil together. Blend well. Set aside to allow flavors to blend together.
  2. Disjoint or cut the chicken wings into little drumsticks and wing sections.
  3. Wash the chicken pieces, then place in a large ziploc storage bag.
  4. Pour the soy sauce / fish sauce marinade into the ziploc bag, seal, then flip over a few times to distribute the marinade over the wings.
  5. Place the wings laying flat in refrigerator and let marinate for 2 hours. Turn over every 20 – 30 minutes.
  6. Preheat oven to 450° F.
  7. Place the marinated chicken wings on a baking pan that has been covered with non-stick aluminum foil. Try not to let the chicken wings touch together.
  8. Bake for 25 minutes on a side.

These Oriental Seasoned Chicken Wings could also be served as an appetizer.

Gravy and Bisquits Breakfast Meal

Gravy and Bisquits

If you like waking up on Sunday morning to a hearty breakfast, then this recipe is for you. Now, it’s not something you want to eat everyday since it’s made with sausage but it’s so tasty it’s worth having a couple times a year.

When we’re feeling lazy, we use Pillsbury Grands biscuits from the refrigerator section of the grocery store. But there really isn’t much to making drop biscuits from scratch so when we don’t have a refigerator ready biscuit tube on hand, we make homemade biscuit dough in about five minutes.

  1. Preheat oven to 400° F
  2. Brown a one pound breakfast sausage roll in a large non-stick skillet. While cooking, chop up into fine pieces similar to ground beef used in spaghetti sauce.
  3. Place biscuits in oven, Grands cook in about 12 minutes.
  4. Add 1/2 cup chopped onion to the sausage, and cook for 2 minutes.
  5. Sprinkle 3 tbsp flour over the top of the sausage and onions, turn frequently, and cook for another minute.
  6. Add 2 cups low fat milk to the pan, and cook over medium heat stirring frequently until sauce thickens, about 10 minutes.
  7. Break up the cooked biscuits into 1 to 2 inch chunks, and place a few pieces in the bottom of a bowl.
  8. Top the biscuit chunks with the sausage and gravy. Sprinkle a little shredded cheddar cheese on top. Add a cooked egg if desired.

Savory Italian Mustard Pork Chops Recipe

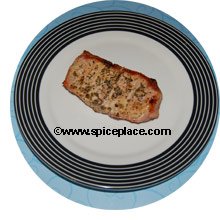
Italian Seasoned Mustard Pork ChopsIf you’re looking for a simple recipe, that cooks fast, and is tasty, consider this recipe for Italian Mustard Pork Chops. It’s so easy to make, and they’re something to enjoy. Honestly, before someone told us to try this recipe, we had never considered seasoning pork chops with mustard or Italian seasoning. But the flavor of these is simply delicious. We grilled our pork chops, but these could either be pan fried or broiled instead.

Italian Seasoned Pork Chops Recipe
4 centercut boneless pork chops
Prepared mustard
Italian Seasoning

Spread some mustard over the top of each pork chop. Sprinkle tops of each pork chop with a little Italian seasoning blend. Grill, fry, or broil until thoroughly cooked. Serve with mashed potatoes or potato salad, and a garden salad.